-
Notifications
You must be signed in to change notification settings - Fork 14
ObjectStorage Config
Government VPN Required
The AWS S3 CLI is useful for testing and works on all platforms, please followthe Official Install Instructions to configure it lcoally.
brew install awscli-
You need Admin rights
-
Download and run the AWS CLI MSI installer for Windows
Alternatively, you can run the msiexec commands to run the MSI installer.
C:\> msiexec.exe /i https://awscli.amazonaws.com/AWSCLIV2.msi
Using the CLI tooling you do not need to have VPN running.
Verify AWS CLI installed:
> aws --version
aws-cli/2.16.10 Python/3.11.9 Darwin/23.5.0 source/arm64
>
Verify connectivity to SIMS local dev bucket:
You will need to get the config and credentials files from Jason/Stephen. These files need to be added or appended in the .aws dictory or equivalent to verify using the CLI tooling.
> aws s3 ls s3://sims-local --profile sims-local
2024-07-30 13:47:39          0 Dummy file to be uploaded.txt
>
At this point, you may want to try out aws s3 cp and aws s3 rm
Note: S3 Policy has been applied to prevent accessing the other buckets from outside of OpenShift.
You will need a Javascript/Typescript library to interact with S3. Libraries have not been evaluated yet but some to investigate include:
With your Government VPN running, navigate to the Object Storage Management console.
Typically for every bucket created a bucket policy and a user must be created.
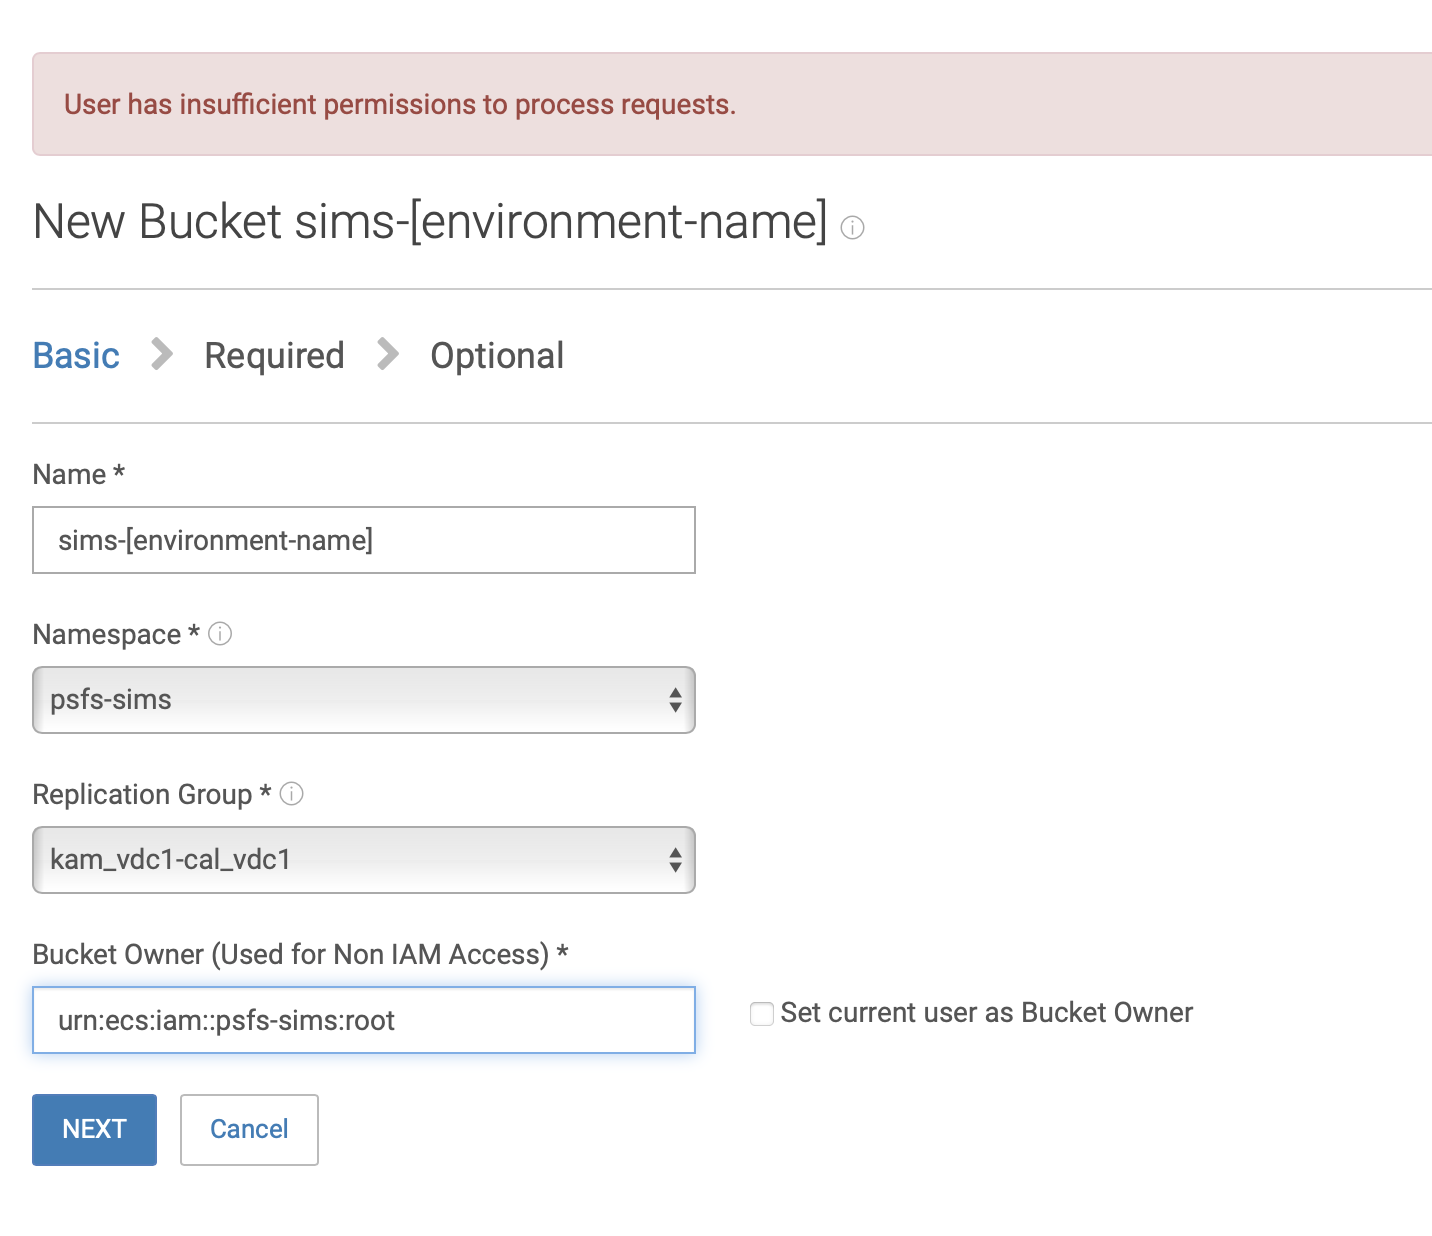
Navigate to Manage/Buckets and click on Create Bucket
As per the image below, add a relevant name and set the bucket owner to urn:ecs:iam::psfs-sims:root
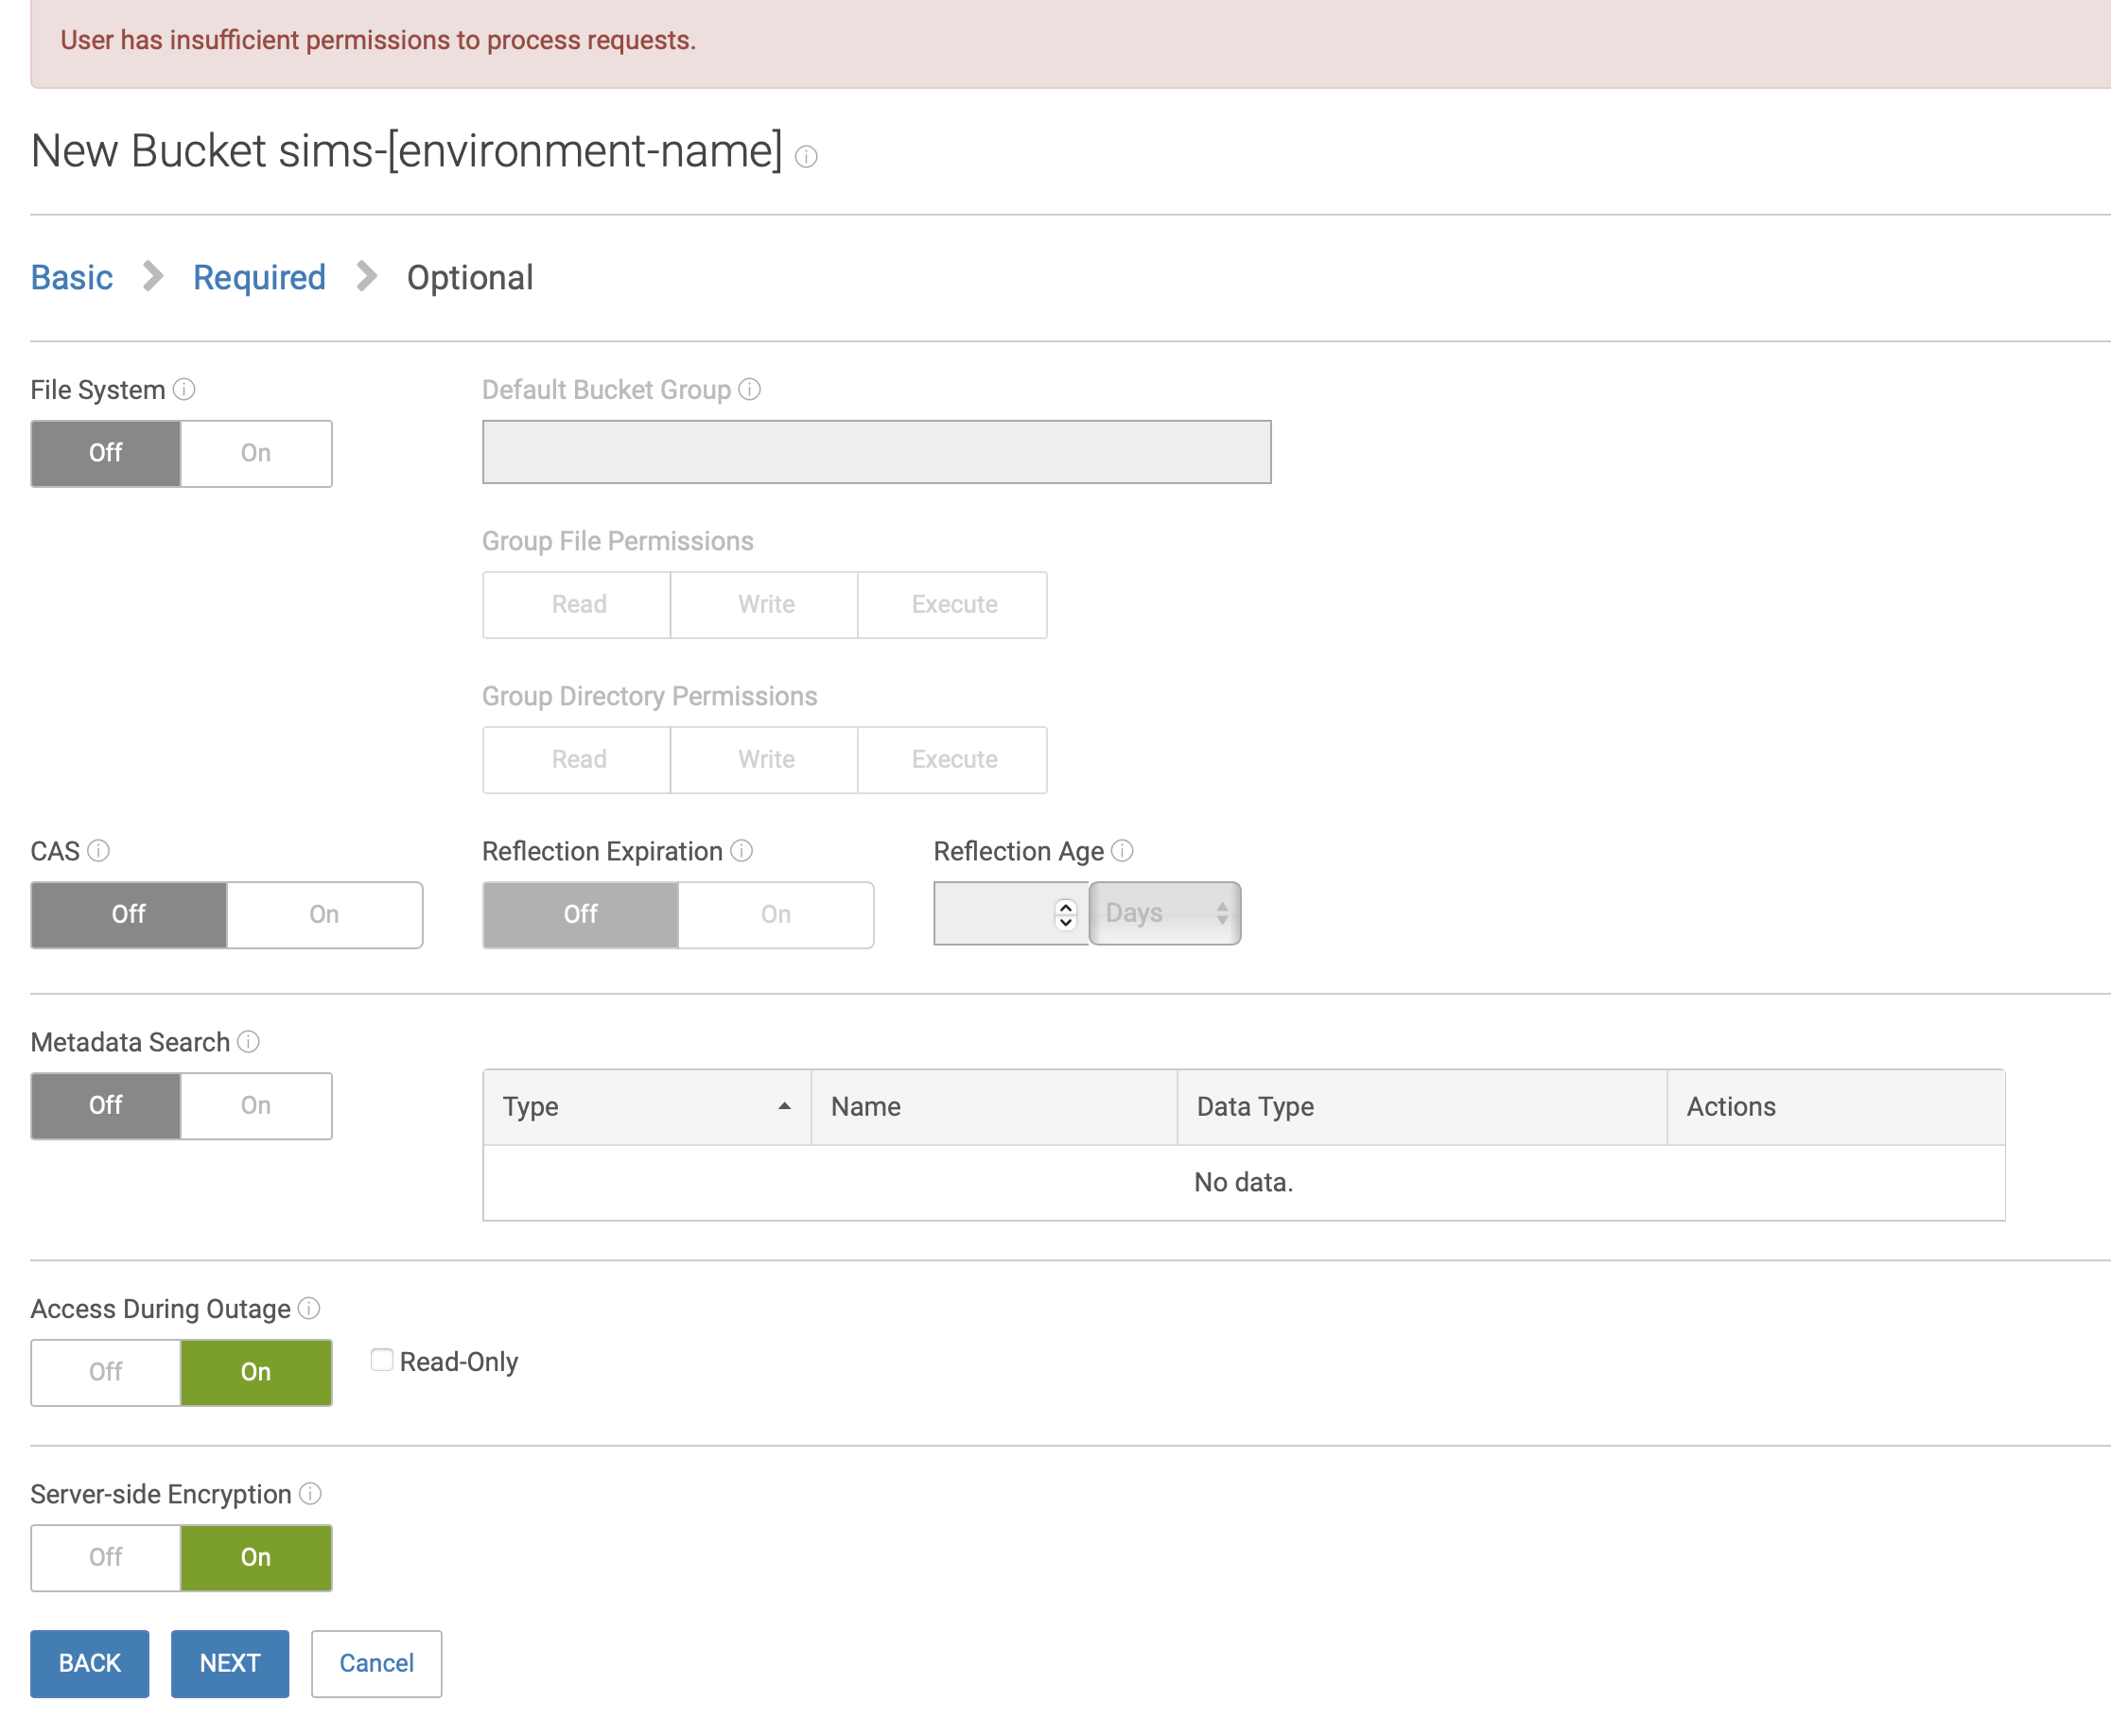
Click NEXT, and click on the Server-side Encryption toggle
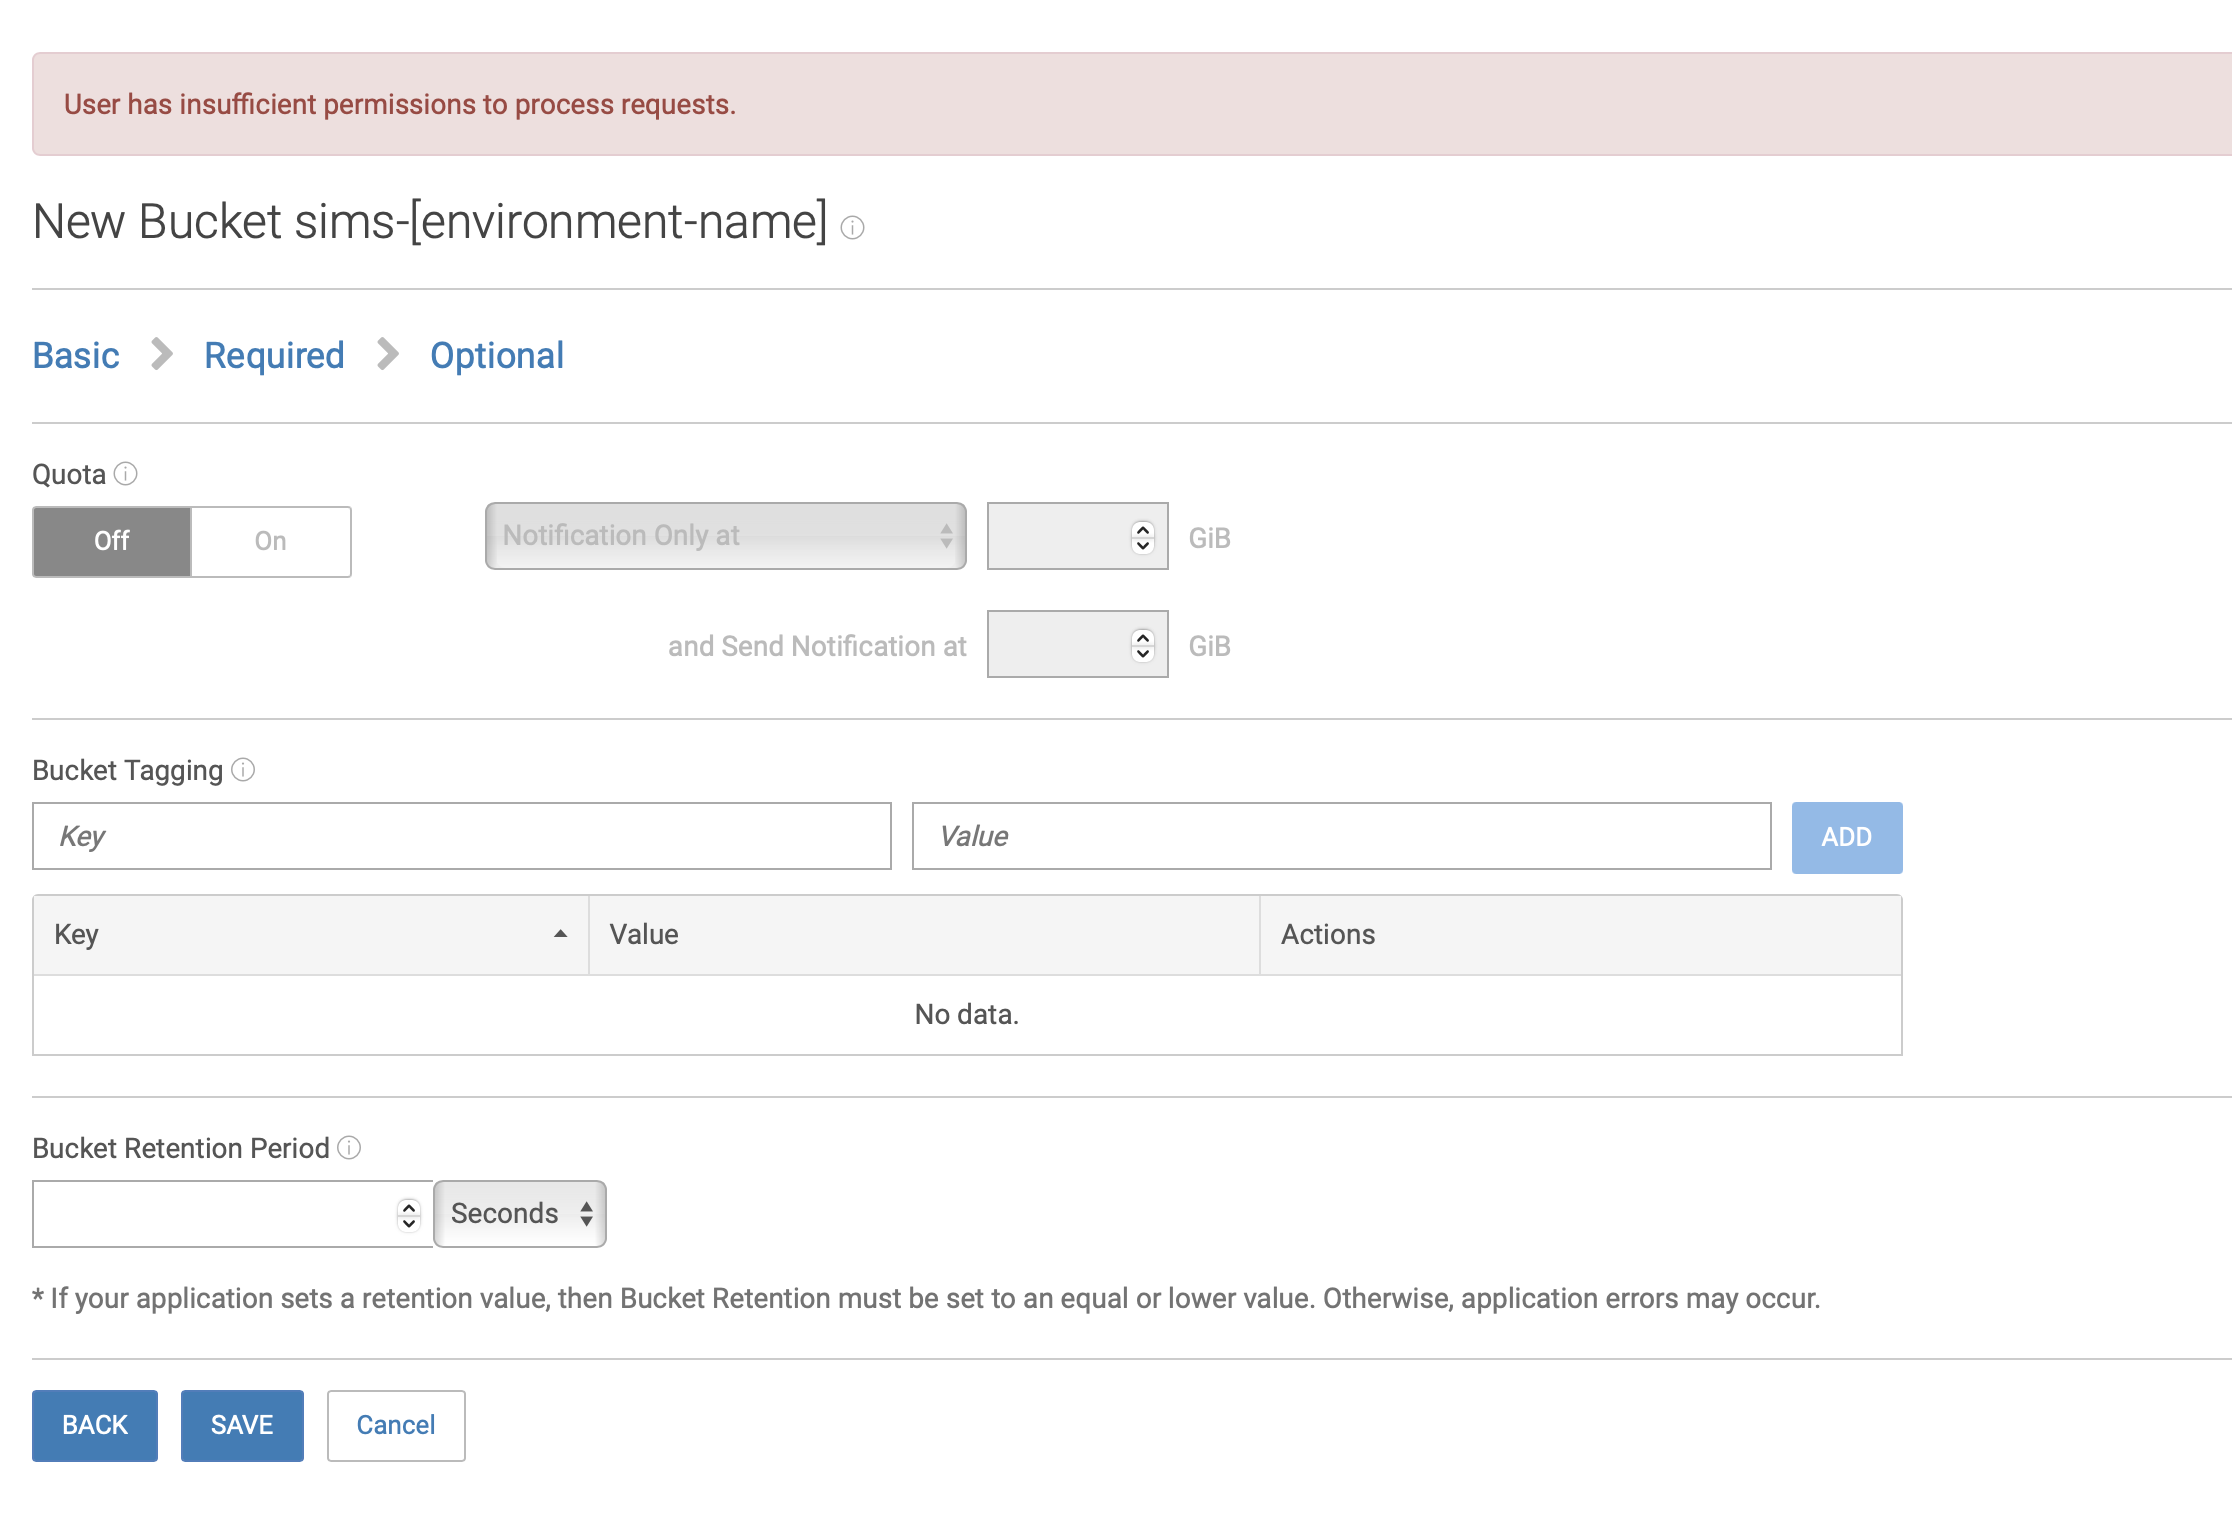
Click NEXT and then click Save
Do this for all buckets that need to be created.
Navigate to Manage/Identity and Access (S3) and click on Policies
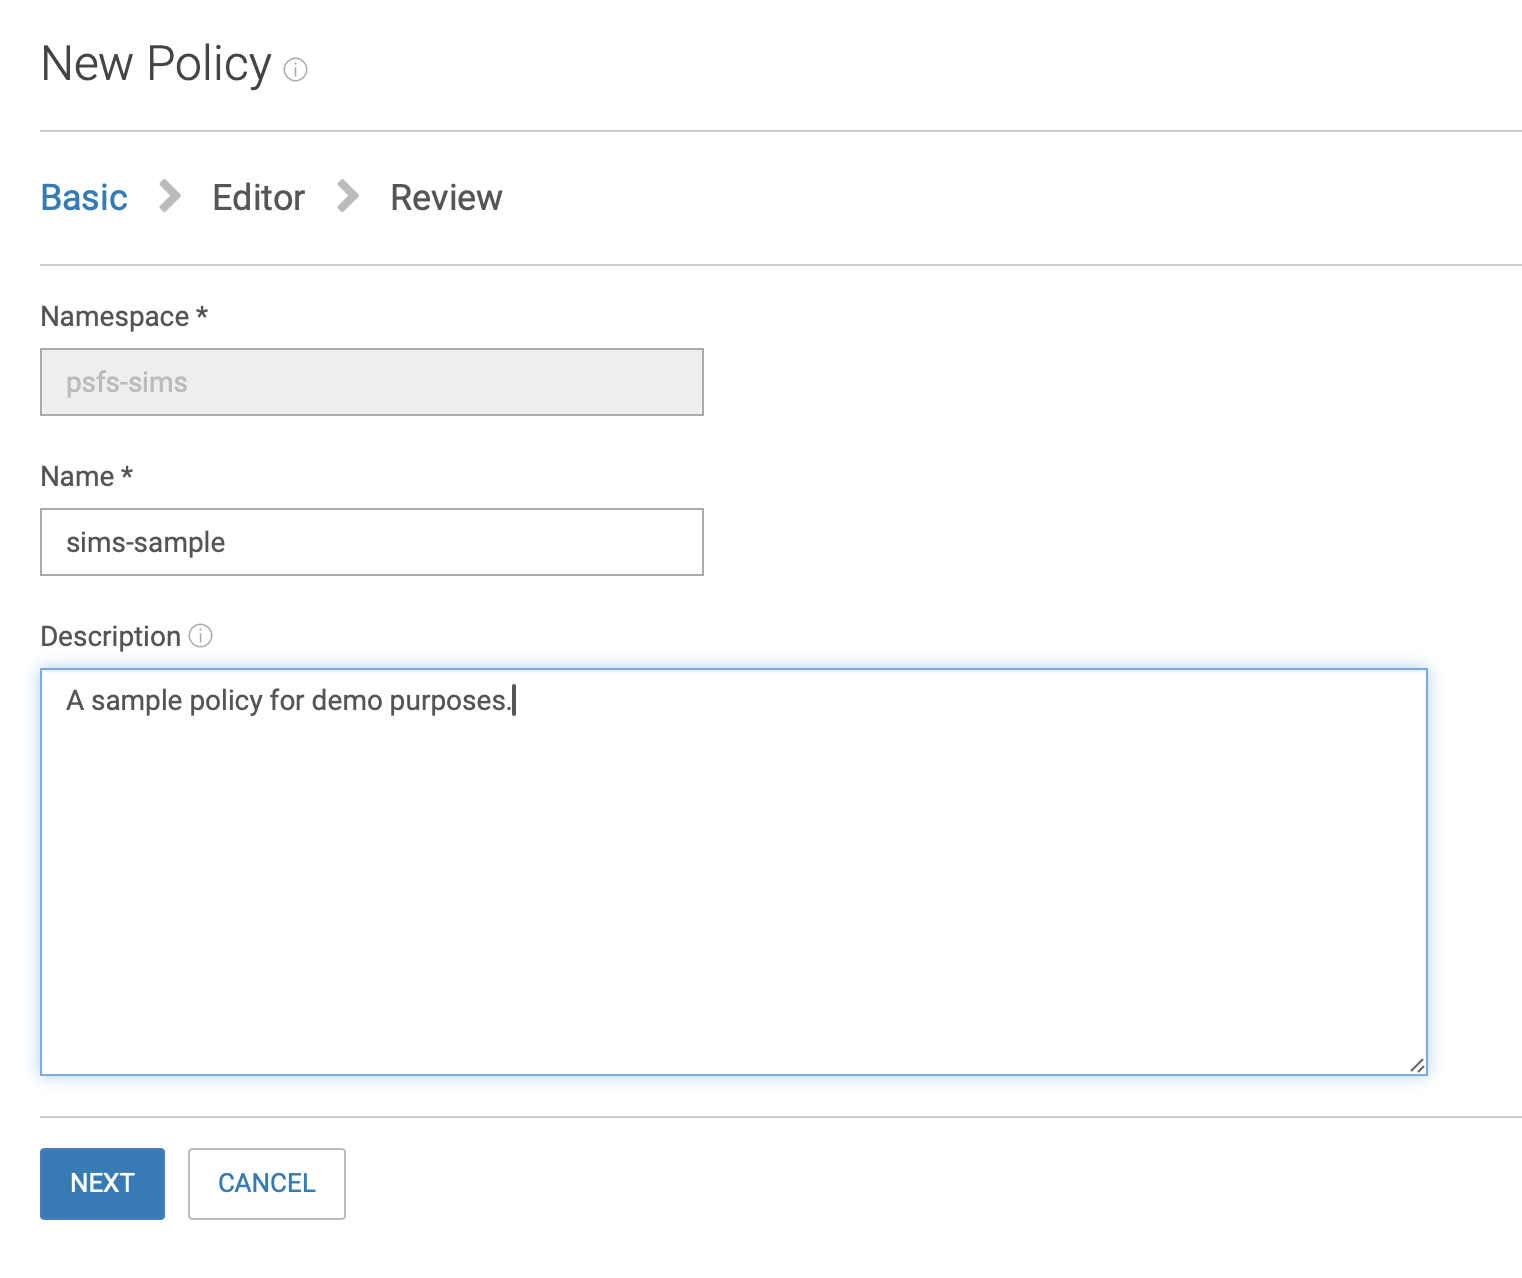
Select psfs_sims from the dropdown, then click the New Policy button
On the first screen fill in the fields as shown:
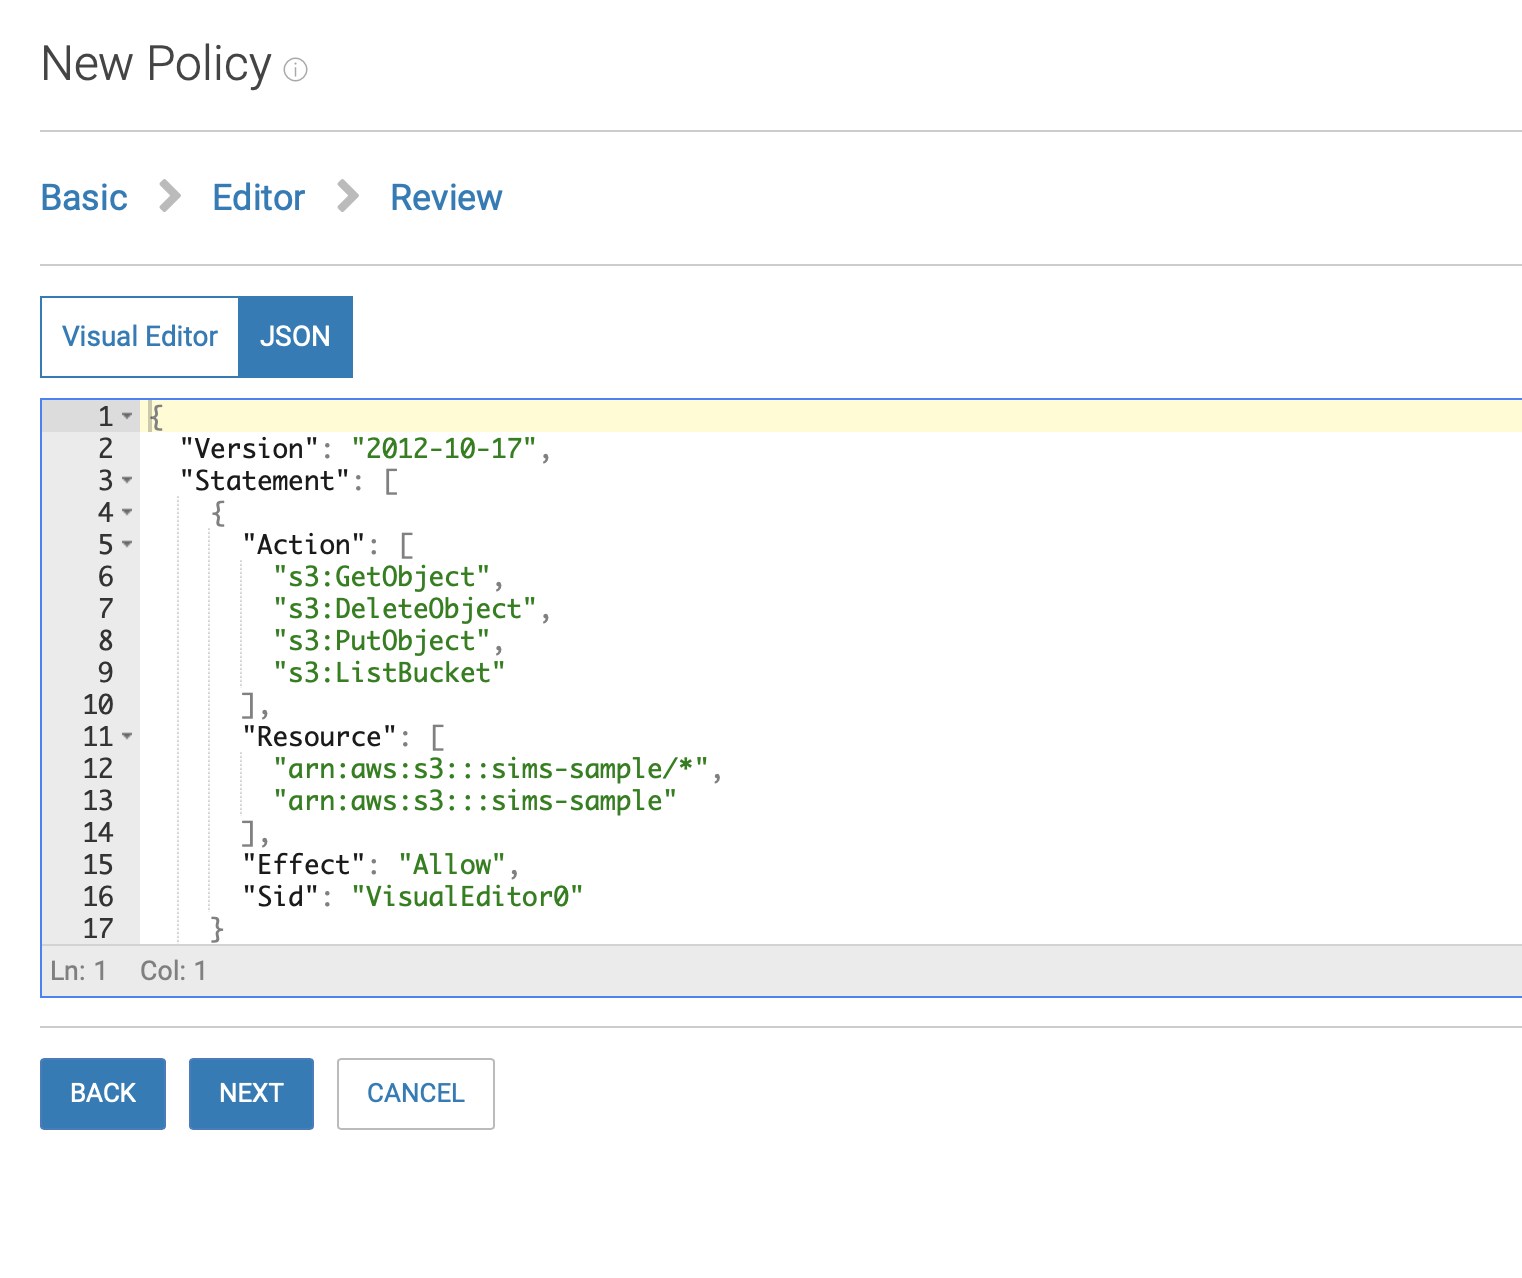
Click on the JSON Editor and paste the contents below modified to match the buckets you're granting access
A sample policy for Open Development use:
{
  "Version": "2012-10-17",
  "Statement": [
    {
      "Action": [
        "s3:GetObject",
        "s3:DeleteObject",
        "s3:PutObject",
        "s3:ListBucket"
      ],
      "Resource": [
        "arn:aws:s3:::sims-sample/*",
        "arn:aws:s3:::sims-sample"
      ],
      "Effect": "Allow",
      "Sid": "VisualEditor0"
    }
  ]
}
A production policy to restrict usage to OpenShift Silver
{
  "Version": "2012-10-17",
  "Statement": [
    {
      "Condition": {
        "ForAnyValue:IpAddress": {
          "aws:SourceIp": [
            "142.34.194.121",
            "142.34.194.122",
            "142.34.194.123",
            "142.34.194.124"
          ]
        }
      },
      "Action": [
        "s3:GetObject",
        "s3:DeleteObject",
        "s3:PutObject",
        "s3:ListBucket"
      ],
      "Resource": [
        "arn:aws:s3:::sims-sample/*",
        "arn:aws:s3:::sims-sample"
      ],
      "Effect": "Allow",
      "Sid": "VisualEditor0"
    }
  ]
}
Which should look something like
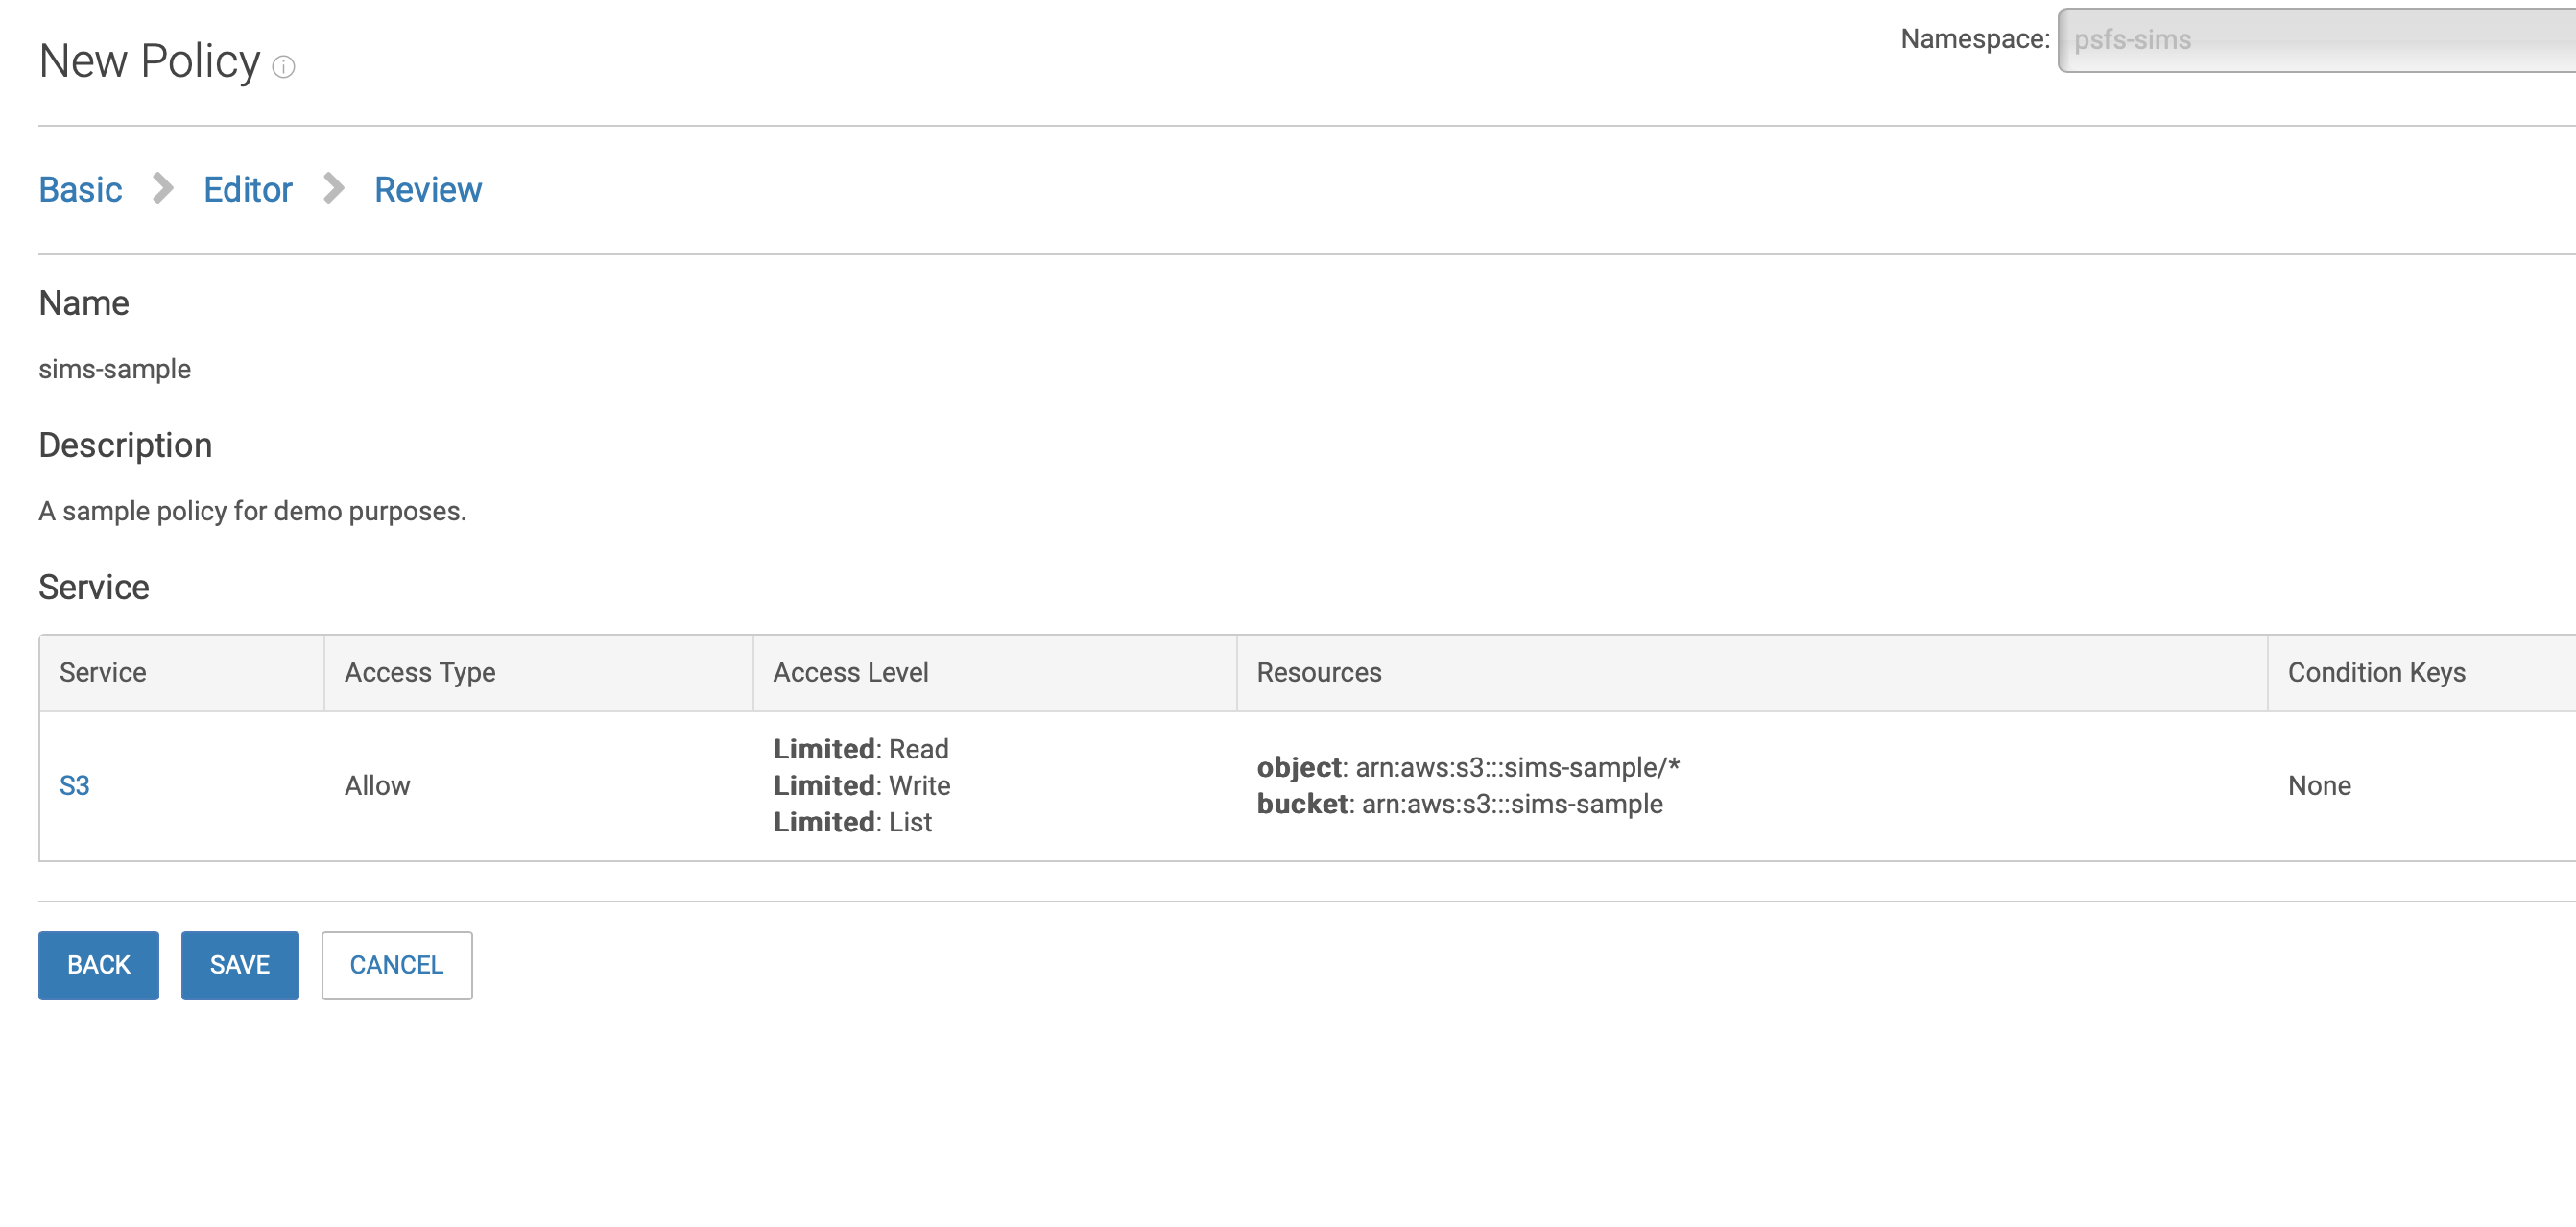
Click Next
and then save on the final screen
Navigate to Manage/Identity and Access (S3) and click on Users
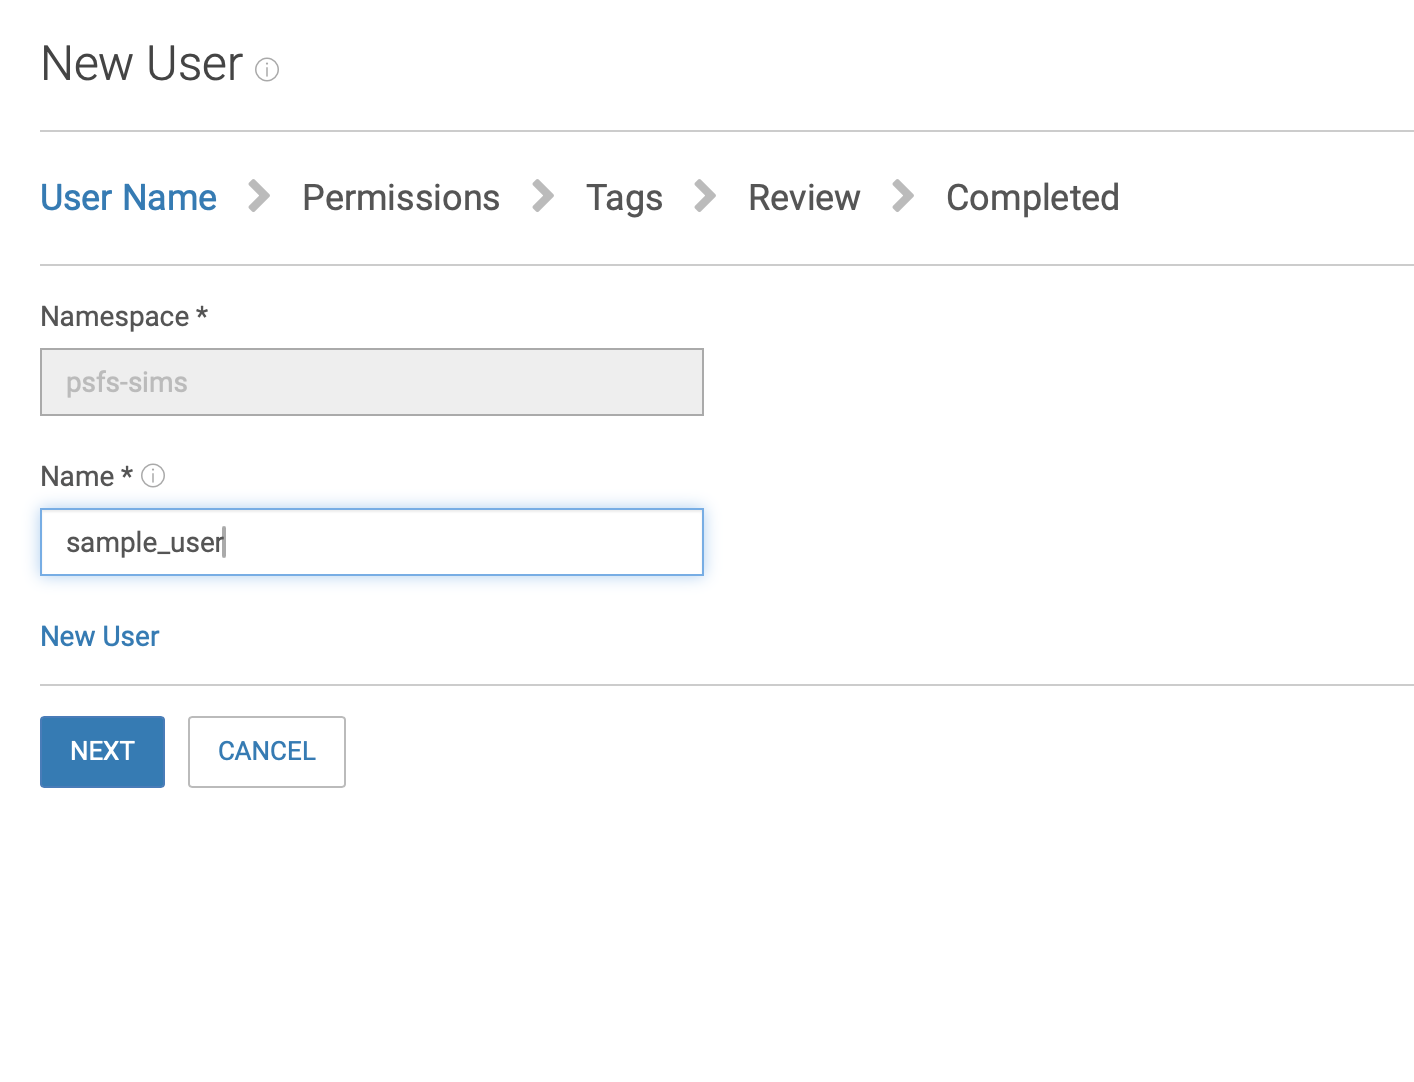
Select psfs_sims from the dropdown, then click the New User button
Enter a Name and click Next
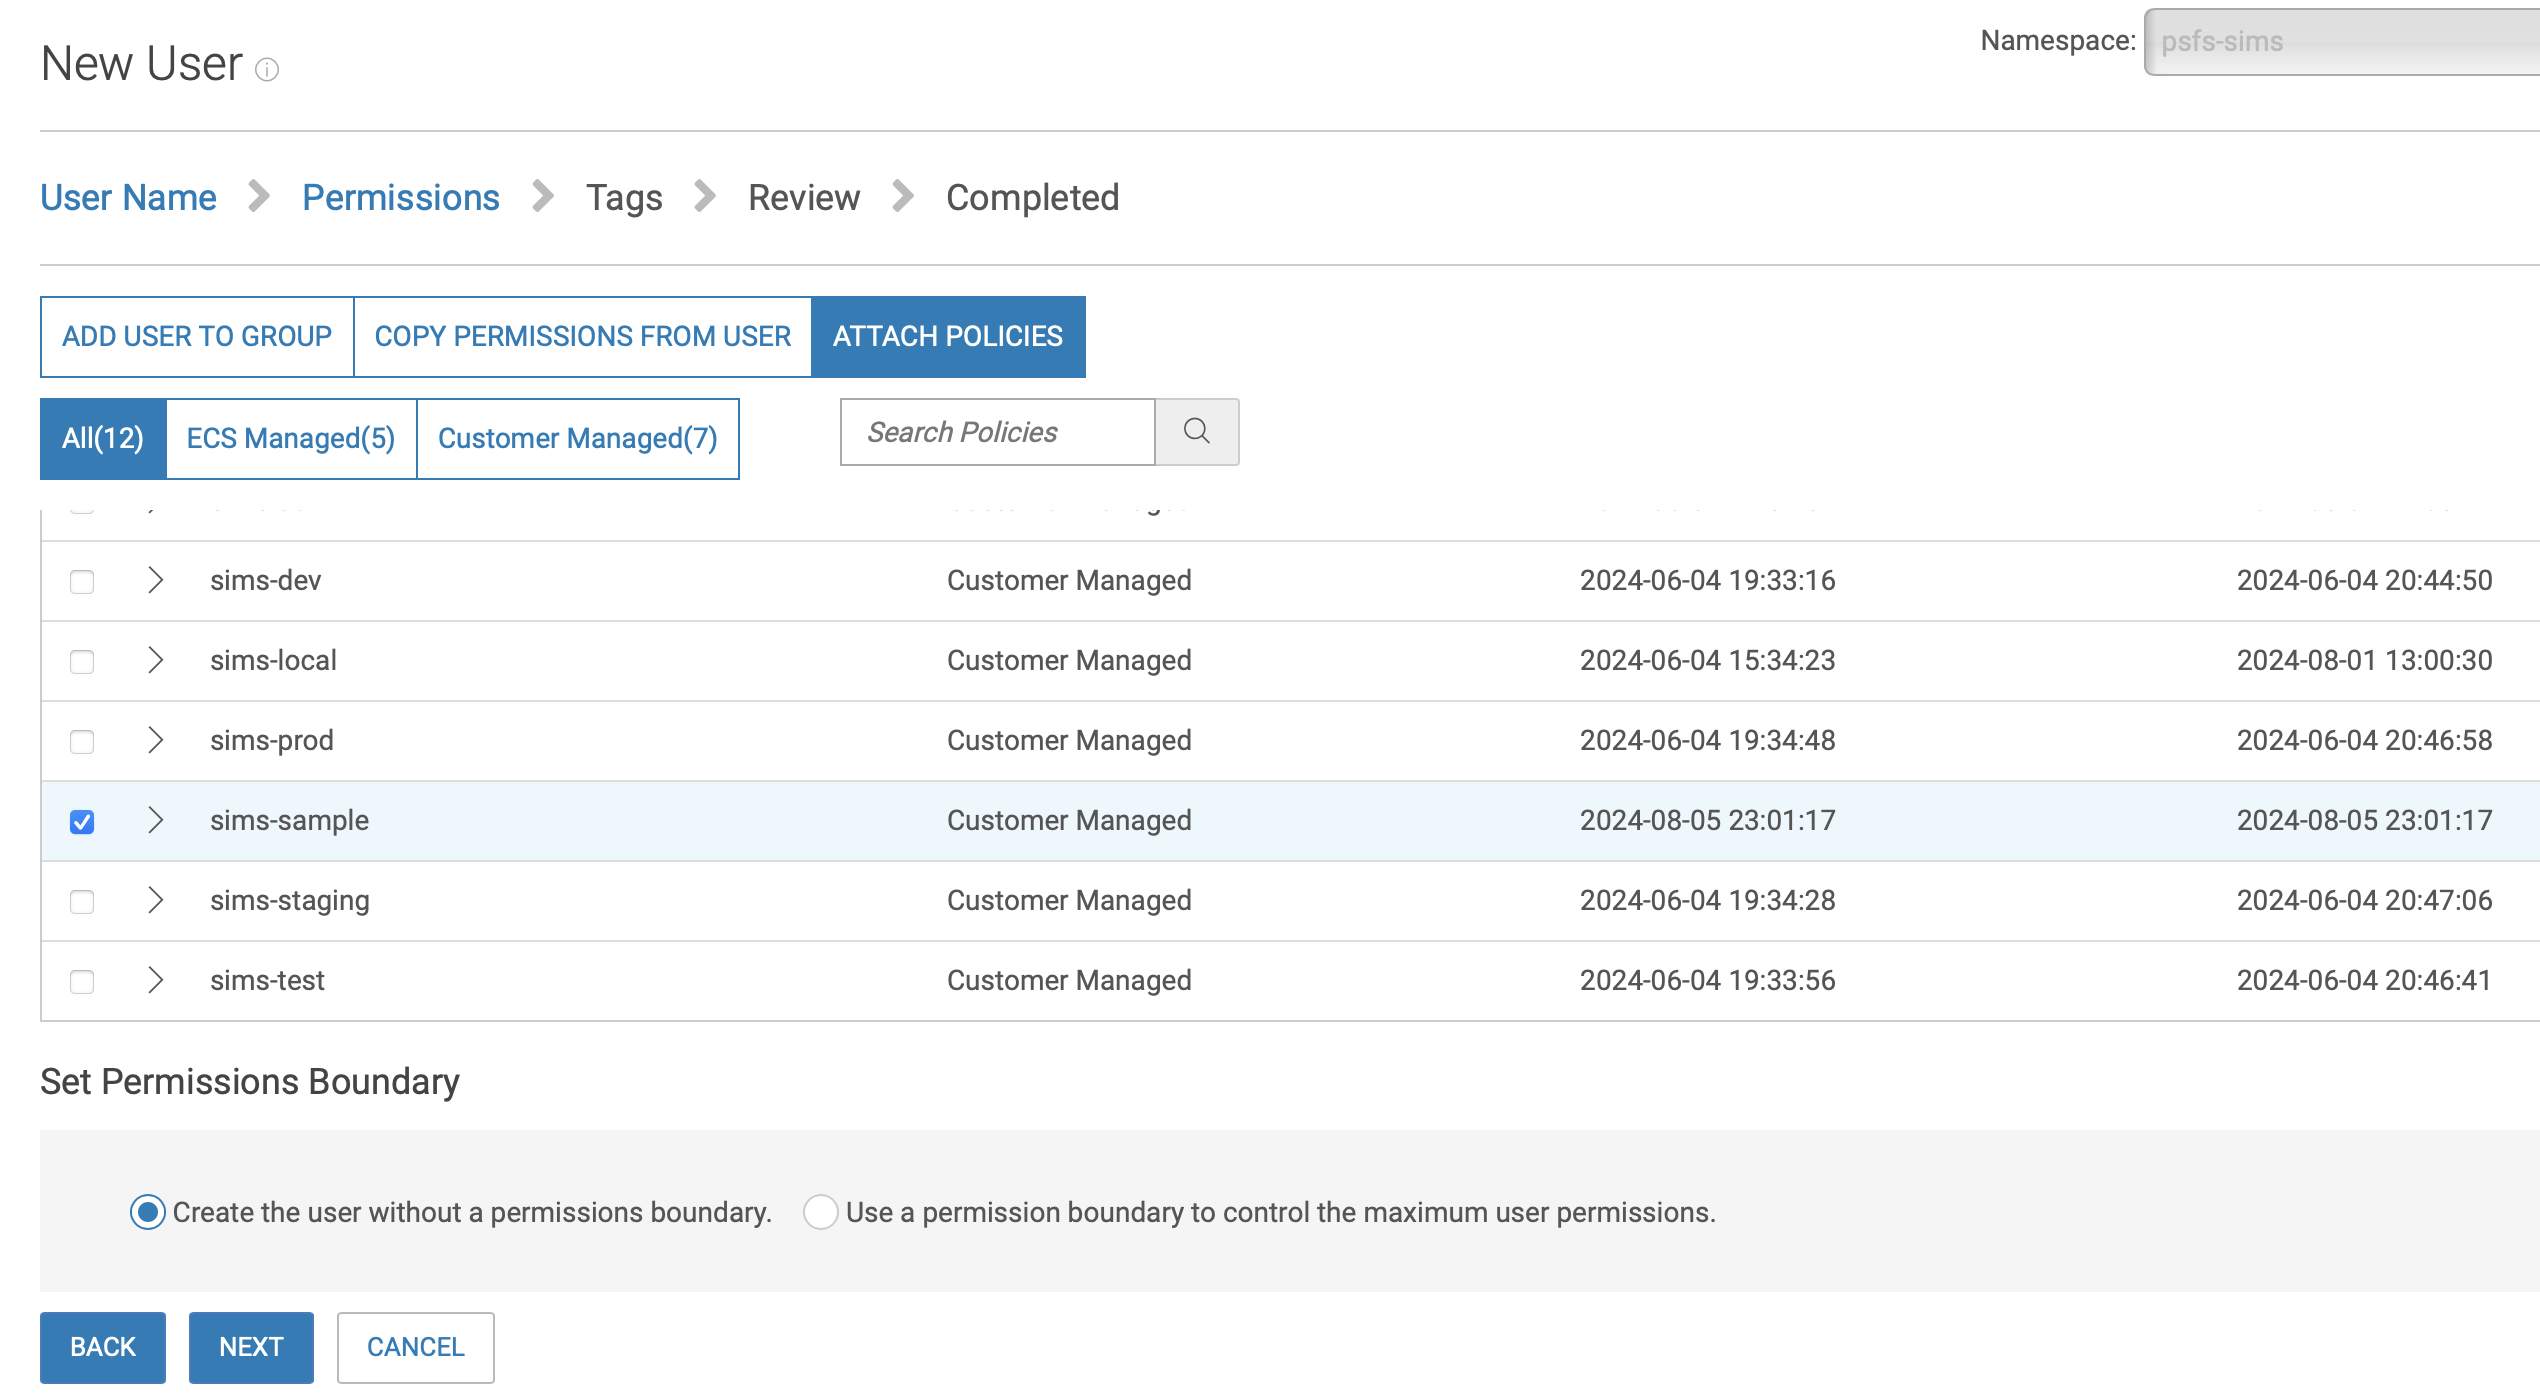
Click on Attach Policies and select the policy that you created then click Next.
Click Next Again (Add tag UI), then click Create User
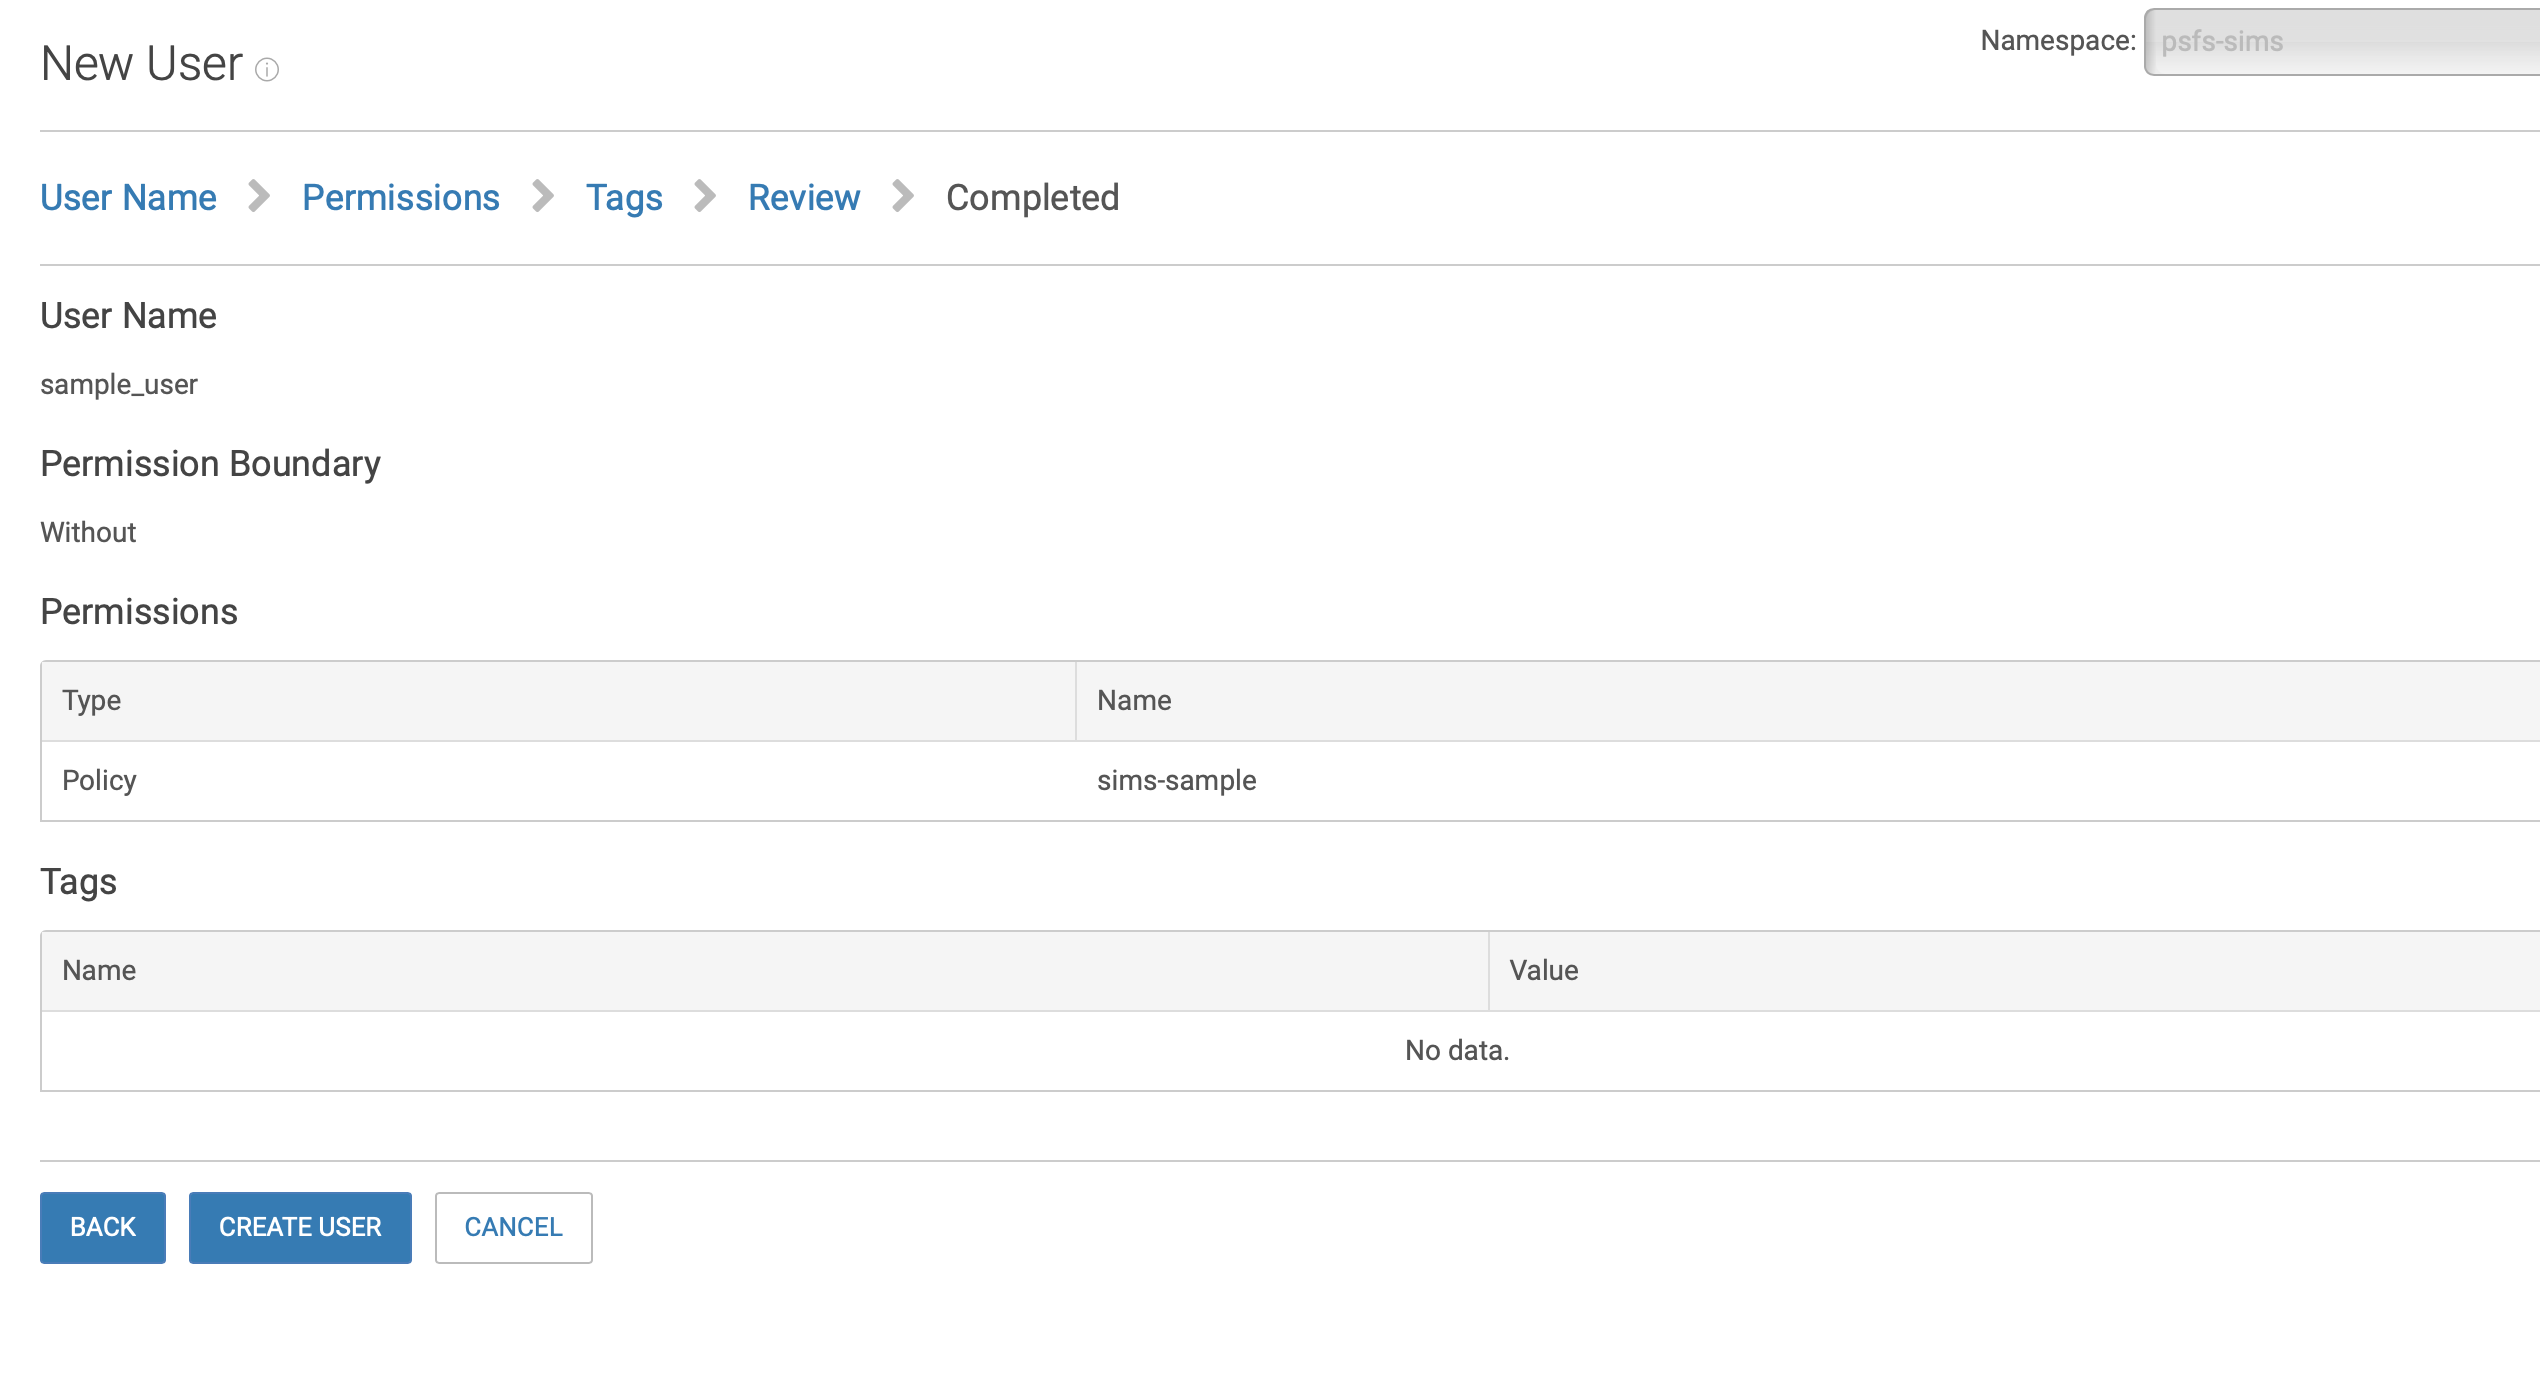
Click on the Download CSV button to save the credentials and supply them to Jason for long term storage.
Click Complete