Homebrew is a package manager that simplifies the installation of various tools and libraries. Please use following commands for installing it.
/bin/bash -c "$(curl -fsSL https://raw.githubusercontent.com/Homebrew/install/HEAD/install.sh)"You will need Node, Watchman, the React Native command line interface, Xcode, Ruby, and CocoaPods.
While you can use any editor of your choice to develop your app, you will need to install Xcode in order to set up the necessary tooling to build your React Native app for iOS.
We recommend installing Node and Watchman using Homebrew. Run the following commands in a Terminal after installing Homebrew:
brew install node@18 # Node.js 18 LTS
brew install node@20 # Node.js 20 LTS
brew install watchman
If you have already installed Node on your system, make sure it is Node 18.18 or newer.
Watchman is a tool by Facebook for watching changes in the filesystem. It is highly recommended you install it for better performance.
Add react native cli using the following command!
npm install -g react-native-cliPlease use the latest version of Xcode.
The easiest way to install Xcode is via the Mac App Store. Installing Xcode will also install the iOS Simulator and all the necessary tools to build your iOS app.
You will also need to install the Xcode Command Line Tools. You have two options to install the command line tools,
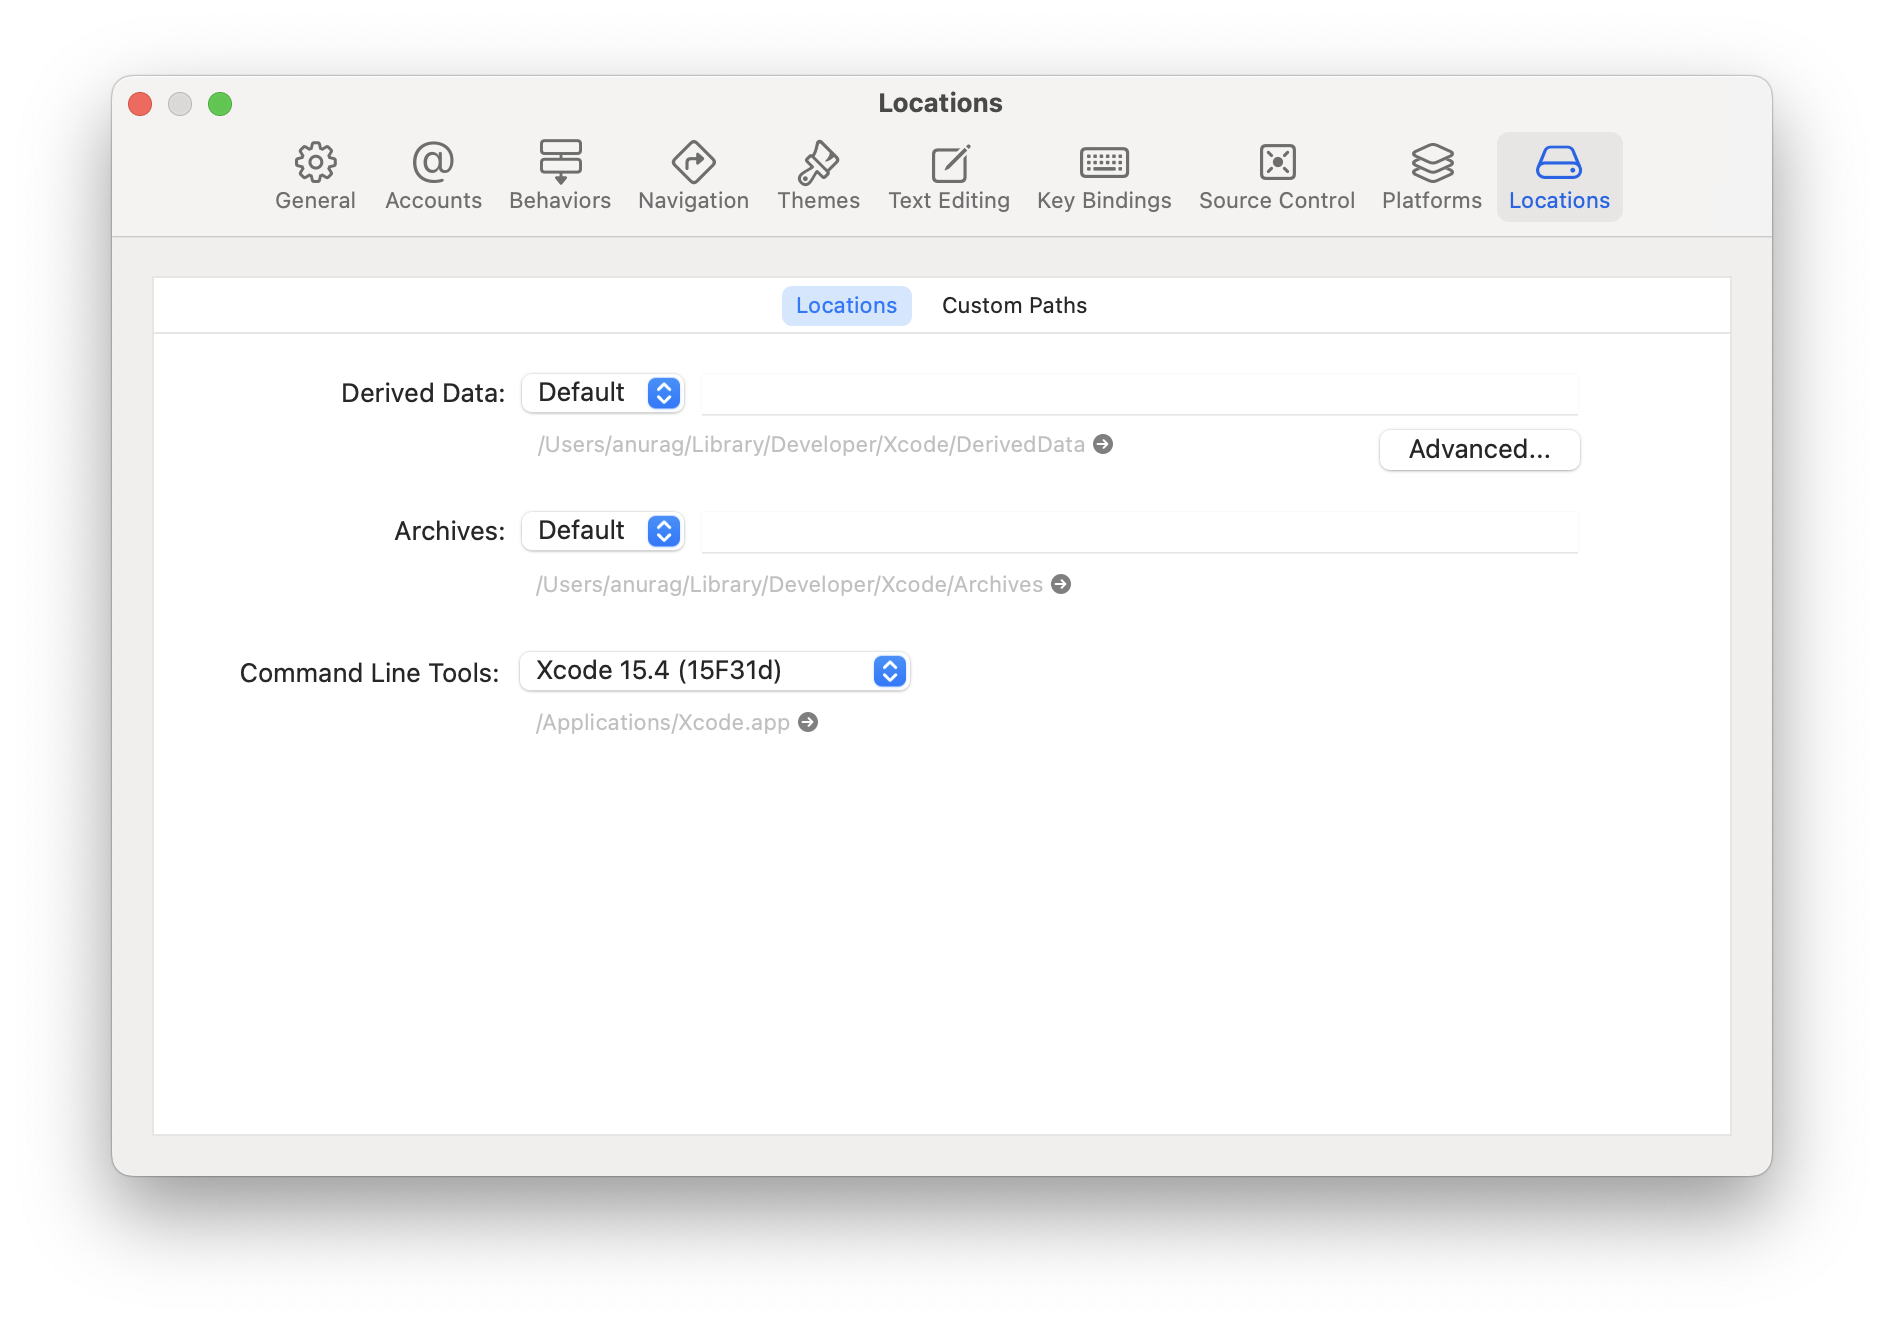
Open Xcode, then choose Settings... (or Preferences...) from the Xcode menu. Go to the Locations panel and install the tools by selecting the most recent version in the Command Line Tools dropdown.
After Xcode is installed:
xcode-select --installA pop-up window will appear asking you to confirm the installation. Click Install.
To ensure the command line tools are installed correctly, run the following command in Terminal:
xcode-select -pIf the installation was successful, the output will show the path to the command line tools, such as /Library/Developer/CommandLineTools.
To install a simulator, open Xcode > Settings... (or Preferences...) and select the Platforms (or Components) tab. Select a simulator with the corresponding version of iOS you wish to use.
If you are using Xcode version 14.0 or greater than to install a simulator, open Xcode > Settings > Platforms tab, then click "+" icon and select iOS… option.
Using Ruby version 3.3.5 is necessary to ensure compatibility with CocoaPods, which is essential for managing dependencies in React Native projects.
# Ensures compatibility with CocoaPods.
brew install rubyCocoaPods is one of the dependency management system available for iOS. CocoaPods is a Ruby gem. You can install CocoaPods using the version of Ruby that ships with the latest version of macOS.
For more information, please visit CocoaPods Getting Started guide. Install CocoaPods using Homebrew:
brew install cocoapodsStarting from React Native version 0.69, it is possible to configure the Xcode environment using the .xcode.env file provided by the template.
The .xcode.env file contains an environment variable to export the path to the node executable in the NODE_BINARY variable. This is the suggested approach to decouple the build infrastructure from the system version of node. You should customize this variable with your own path or your own node version manager, if it differs from the default.
On top of this, it's possible to add any other environment variable and to source the .xcode.env file in your build script phases. If you need to run script that requires some specific environment, this is the suggested approach: it allows to decouple the build phases from a specific environment.
info
If you are already using NVM (a command which helps you install and switch between versions of Node.js) and zsh, you might want to move the code that initialize NVM from your ~/.zshrc into a ~/.zshenv file to help Xcode find your Node executable:
export NVM_DIR="$HOME/.nvm"
[ -s "$NVM_DIR/nvm.sh" ] && \. "$NVM_DIR/nvm.sh"  # This loads nvm
You might also want to ensure that all "shell script build phase" of your Xcode project, is using /bin/zsh as its shell.
Go to the Azul Zulu download page,
- Java Version:
Java 17 (LTS)and Java21 (LTS)(you'll download each separately)
java -versionFor your user account, open your shell configuration file (.zshrc for Zsh or .bash_profile for Bash) using a text editor:
nano ~/.zshrc # or nano ~/.bash_profile# Adds Homebrew to the shell environment.
eval "$(/opt/homebrew/bin/brew shellenv)"
# Enables the OpenSSL legacy provider for Node.js.
# This is often necessary for compatibility with older dependencies.
export NODE_OPTIONS=--openssl-legacy-provider
# Node 14
#export PATH="/usr/local/bin:$PATH"
# Node Homebrew
export PATH="/opt/homebrew/opt/node@16/bin:$PATH"
export LDFLAGS="-L/opt/homebrew/opt/node@16/lib"
export CPPFLAGS="-I/opt/homebrew/opt/node@16/include"
# Ruby Homebrew
export PATH="/opt/homebrew/opt/[email protected]/bin:$PATH"
export LDFLAGS="-L/opt/homebrew/opt/[email protected]/lib"
export CPPFLAGS="-I/opt/homebrew/opt/[email protected]/include"
# Java JDK
export JAVA_HOME=/Library/Java/JavaVirtualMachines/zulu-17.jdk/Contents/Home
# export JAVA_HOME=/Library/Java/JavaVirtualMachines/jdk-20.jdk/Contents/Home
# export JAVA_HOME=/Library/Java/JavaVirtualMachines/jdk-17.jdk/Contents/Home
# export JAVA_HOME=/Library/Java/JavaVirtualMachines/jdk-11.jdk/Contents/Home
# export JAVA_HOME=/Library/Java/JavaVirtualMachines/jdk-8.jdk/Contents/HomeCongratulations! You successfully set up your development environment.
This was written by @hermantrym

