一个企业级的开发框架,可以快速的搭建web项目。就是一堆插件包的封装,用起来有rails的感觉。使用很多装饰器语法,解决ts来写手感很好
npm i -g @nestjs/cli
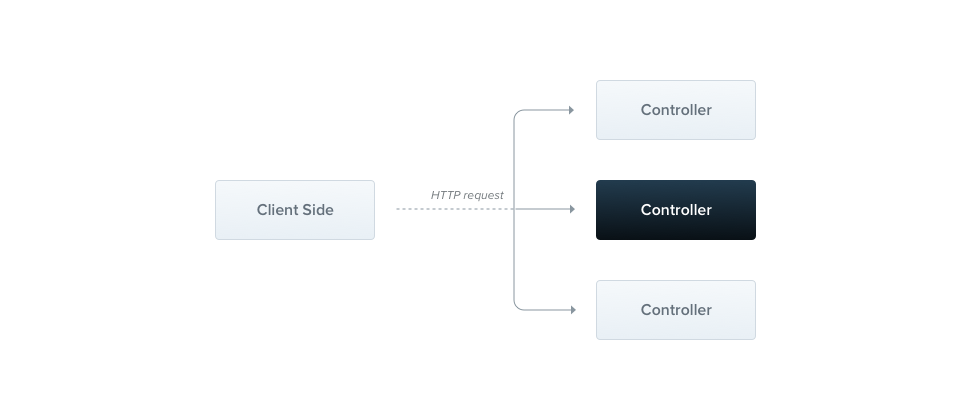
nest new project-name控制器作用是接受特定的请求,对请求做相应处理。每一个控制器可以有多个路由,不同的路由处理不同的请求操作。
nest g co users --no-spec # 不创建测试文件import { Body, Controller, Get, Post } from '@nestjs/common';
import { CreateUserDto } from './dto/create-user.dto';
import { UsersService } from './users.service';
@Controller('user')
export class UserController {
constructor(private userService: UsersService) {}
@Get()
all() {
return this.userService.users();
}
@Post()
create(@Body() data: CreateUserDto) {
return this.userService.create(data);
}
}在nest框架中,所有的数据处理都被封装在Provider中,services就是Provider中的一种。每一个Provider使用@Injectable()进行装饰处理
nest g s users --no-specimport { Injectable } from '@nestjs/common';
@Injectable()
export class UsersService {
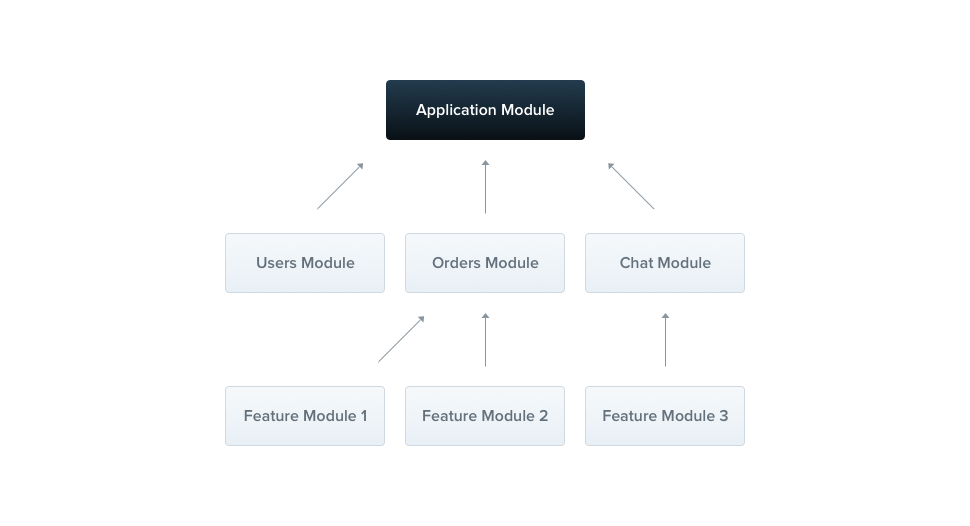
}模块是具有 @Module() 装饰器的类。 @Module() 装饰器提供了元数据,Nest 用它来组织应用程序结构。
每个 Nest 应用程序至少有一个模块,即根模块。根模块是 Nest 开始安排应用程序树的地方。事实上,根模块可能是应用程序中唯一的模块,特别是当应用程序很小时,但是对于大型程序来说这是没有意义的。在大多数情况下,您将拥有多个模块,每个模块都有一组紧密相关的功能。
| providers | 由 Nest 注入器实例化的提供者,并且可以至少在整个模块中共享 |
|---|---|
| 由 Nest 注入器实例化的提供者,并且可以至少在整个模块中共享 | |
| controllers | 必须创建的一组控制器 |
| imports | 导入模块的列表,这些模块导出了此模块中所需提供者 |
| exports | 由本模块提供并应在其他模块中可用的提供者的子集。 |
中间件是在路由处理程序 之前 调用的函数。 中间件函数可以访问请求和响应对象,以及应用程序请求响应周期中的 next() 中间件函数。 next() 中间件函数通常由名为 next 的变量表示。
nest g middleware tmp --no-spec
npm i cookie-parser
import {
Injectable,
NestMiddleware,
UnauthorizedException,
} from '@nestjs/common';
@Injectable()
export class TmpMiddleware implements NestMiddleware {
use(req: any, res: any, next: () => void) {
// 登陆验证
if (req.cookies.token) {
next();
} else {
// next();
throw new UnauthorizedException();
}
}
}使用中间件(app.module.ts)
import { MiddlewareConsumer, Module, NestModule } from '@nestjs/common';
import { TmpMiddleware } from './tmp.middleware';

@Module({
  imports: [
  ],
  controllers: [
  ],
  providers: [],
})
export class AppModule implements NestModule {
  configure(consumer: MiddlewareConsumer) {
    consumer.apply(TmpMiddleware).forRoutes(...['book', 'subject']); // 使用中间件
  }
}
main.ts
import { NestFactory } from '@nestjs/core';
import { AppModule } from './app.module';
import * as cookieParser from 'cookie-parser'; // 使用cookie格式化插件

async function bootstrap() {
  const app = await NestFactory.create<NestExpressApplication>(AppModule);
  app.enableCors({ origin: true, credentials: true }); // 允许跨域和传递cookie
  app.use(cookieParser()); // cookie 格式化插件

  await app.listen(3000);
}
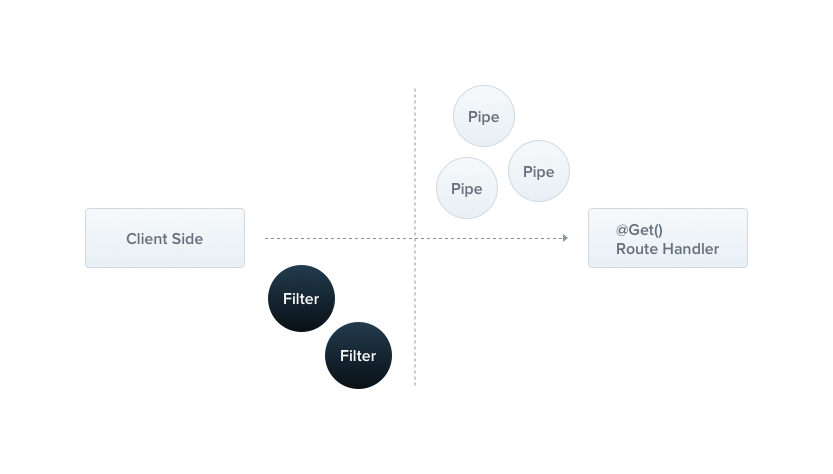
bootstrap();内置的异常层负责处理整个应用程序中的所有抛出的异常。当捕获到未处理的异常时,最终用户将收到友好的响应。
可以自己定义异常过滤器
nest g filter any-exceptionimport {
ExceptionFilter,
Catch,
ArgumentsHost,
HttpException,
HttpStatus,
} from '@nestjs/common';
import { TypeORMError } from 'typeorm';
import { Prisma } from '@prisma/client';
// https://docs.nestjs.cn/8/exceptionfilters?id=%e5%bc%82%e5%b8%b8%e8%bf%87%e6%bb%a4%e5%99%a8-1
// 自定义异常过滤器处理TypeORMError
@Catch(Prisma.PrismaClientKnownRequestError)
@Catch(TypeORMError)
export class AnyExceptionFilter<T> implements ExceptionFilter {
catch(exception: any, host: ArgumentsHost) {
const ctx = host.switchToHttp();
const response = ctx.getResponse();
const request = ctx.getRequest();
const status =
exception instanceof HttpException
? exception.getStatus()
: HttpStatus.INTERNAL_SERVER_ERROR;
response.status(status).json({
statusCode: status,
timestamp: new Date().toISOString(),
path: request.url,
errorMessage: exception?.message,
data: {},
success: false,
});
}
}main.ts
import { AnyExceptionFilter } from './any-exception.filter';
async function bootstrap() {
  const app = await NestFactory.create(AppModule);
  app.useGlobalFilters(new AnyExceptionFilter());
  await app.listen(3000);
}
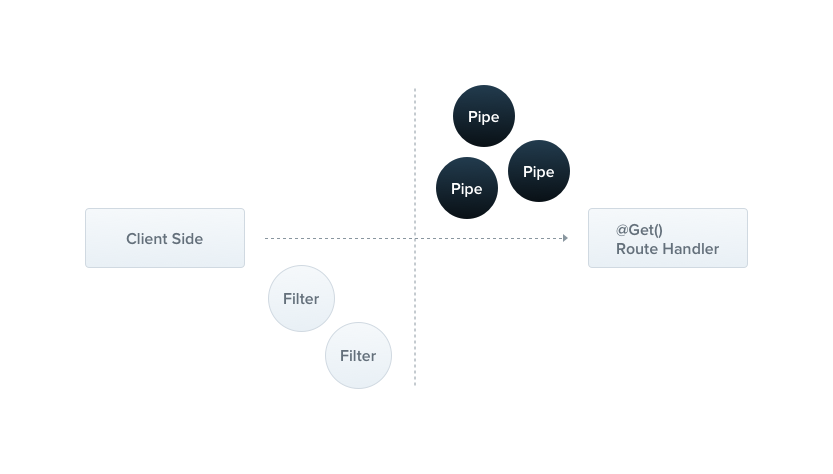
bootstrap();管道是具有 @Injectable() 装饰器的类。管道应实现 PipeTransform 接口。
管道有两个类型:
- 转换:管道将输入数据转换为所需的数据输出
- 验证:对输入数据进行验证,如果验证成功继续传递; 验证失败则抛出异常;
Nest 与 class-validator 配合得很好。这个优秀的库允许您使用基于装饰器的验证。装饰器的功能非常强大,尤其是与 Nest 的 Pipe 功能相结合使用时,因为我们可以通过访问 metatype 信息做很多事情,在开始之前需要安装一些依赖。
npm i --save class-validator class-transformercreate-user.dto.ts
import { IsString, IsInt } from 'class-validator';

export class CreateCatDto {
  @IsString()
	@IsNotEmpty()
  userName: string;

  @IsInt()
  age: number;

  @IsString()
	@IsNotEmpty()
  password: string;
}
main.ts
import { ValidationPipe } from '@nestjs/common';
async function bootstrap() {
  const app = await NestFactory.create(AppModule);
  app.useGlobalPipes(new ValidationPipe());
  await app.listen(3000);
}
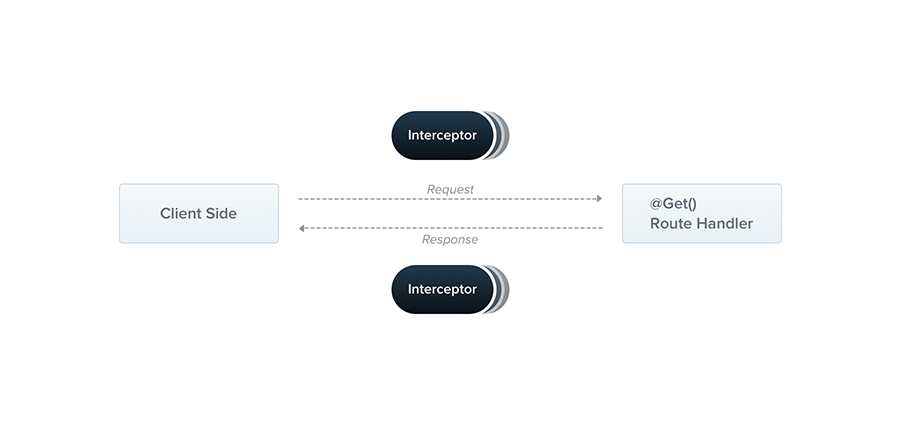
bootstrap();拦截器具有一系列有用的功能,这些功能受面向切面编程(AOP)技术的启发。它们可以:
- 在函数执行之前/之后绑定额外的逻辑
- 转换从函数返回的结果
- 转换从函数抛出的异常
- 扩展基本函数行为
- 根据所选条件完全重写函数 (例如, 缓存目的)
nest g in all-response --no-specimport {
CallHandler,
ExecutionContext,
Injectable,
NestInterceptor,
} from '@nestjs/common';
import { map, Observable } from 'rxjs';
/*
{
"success": true,
"data": {},
"errorCode": "1001",
"errorMessage": "error message",
"showType": 2,
"traceId": "someid",
"host": "10.1.1.1"
}
*/
// 拦截输出,对所有的服务器响应数据做统一的格式化处理
@Injectable()
export class AllResponseInterceptor implements NestInterceptor {
intercept(context: ExecutionContext, next: CallHandler): Observable<any> {
return next.handle().pipe(
map((data) => {
return {
data,
success: true,
errorMessage: '',
};
}),
);
}
}main.ts
import { AllResponseInterceptor } from './all-response.interceptor';
async function bootstrap() {
  const app = await NestFactory.create(AppModule);
  app.useGlobalInterceptors(new AllResponseInterceptor());
  await app.listen(3000);
}
bootstrap();npm install --save @nestjs/swagger swagger-ui-expressmain.ts
import { NestFactory } from '@nestjs/core';
import { SwaggerModule, DocumentBuilder } from '@nestjs/swagger';
import { AppModule } from './app.module';
import { NestExpressApplication } from '@nestjs/platform-express';

async function bootstrap() {
  const app = await NestFactory.create<NestExpressApplication>(AppModule);

  const config = new DocumentBuilder()
    .setTitle('Cats example')
    .setDescription('The cats API description')
    .setVersion('1.0')
    .addTag('cats')
    .build();
  const document = SwaggerModule.createDocument(app, config);
  SwaggerModule.setup('api', app, document); // localhost:3000/api 访问接口文档

  await app.listen(3000);
}
bootstrap();npm i prisma -D # 安装依赖
npx prisma init --datasource-provider sqlite # 初始化数据库文件,使用sqlite
npx prisma db push # 生成数据库
nest g s prisma # 创建一个连接数据库的服务prisma/schema.prisma
// This is your Prisma schema file,
// learn more about it in the docs: https://pris.ly/d/prisma-schema

generator client {
  provider = "prisma-client-js"
}

datasource db {
  provider = "sqlite"
  url      = env("DATABASE_URL")
}

model user {
  id        String   @id @unique @default(uuid())
  userName  String   @unique @map("user_name")
  password  String   @default("")
  nickName  String   @default("") @map("nick_name")
  address   String   @default("")
  createdAt DateTime @default(now()) @map("created_at")
  updatedAt DateTime @updatedAt @map("updated_at")

  @@map("users")
}
初始化数据库
npx prisma db push # 生成数据库prisma.service.ts
import { INestApplication, Injectable, OnModuleInit } from '@nestjs/common';
import { PrismaClient } from '@prisma/client';

@Injectable()
export class PrismaService extends PrismaClient
  implements OnModuleInit {

  async onModuleInit() {
    await this.$connect();
  }

  async enableShutdownHooks(app: INestApplication) {
    this.$on('beforeExit', async () => {
      await app.close();
    });
  }
}
app.module.ts
import { MiddlewareConsumer, Module, NestModule } from '@nestjs/common'
import { PrismaService } from './prisma/prisma.service';

@Module({
  imports: [

  ],
  controllers: [
  ],
  providers: [PrismaService], // 注册一下
})
export class AppModule implements NestModule {
  configure(consumer: MiddlewareConsumer) {

  }
}
简单实用的例子
import { Injectable } from '@nestjs/common';
import { PrismaService } from 'src/prisma/prisma.service';
import { encodePwd } from 'src/utils/tool';
import { CreateUserDto } from './dto/create-user.dto';

@Injectable()
export class UserService {
  constructor(private prisma: PrismaService) {}

  async users() {
    return this.prisma.user.findMany({ where: {} });
  }

  async create(data: CreateUserDto) {
    return this.prisma.user.create({
      data: {
        ...data,
        password: encodePwd(data.password),
      },
    });
  }

  /**
   *  根据名字获取数据
   * @param userName
   * @returns
   */
  async userByUserName(userName: string) {
    return this.prisma.user.findUnique({ where: { userName } });
  }

  async userLogin(userName: string, password: string) {
    const user = await this.prisma.user.findUnique({ where: { userName } });
    if (user) {
      const pwd = encodePwd(password);
      if (pwd == user.password) {
        return {
          success: true,
          errorMessage: '登陆成功',
          data: user.id,
        };
      }
      return {
        success: false,
        errorMessage: '密码错误',
        data: '',
      };
    }
    return {
      success: false,
      errorMessage: '用户信息不存在',
      data: '',
    };
  }
}function App() {
const loadBooks = () => {
fetch('http://localhost:3000/books')
.then((res) => res.json())
.then((res) => console.log(res));
};
const loadMovies = () => {
fetch('http://localhost:3000/movies', {
credentials: 'include',
})
.then((res) => res.json())
.then((res) => console.log(res));
};
const loginHandle = () => {
fetch('http://localhost:3000/app/login', {
method: 'POST',
body: JSON.stringify({
userName: 'xiaohua',
password: '123',
}),
credentials: 'include', // 允许服务器传递cookie过来
})
.then((res) => res.json())
.then((res) => console.log(res));
};
return (
<div className='App'>
<button onClick={loginHandle}>登陆</button>
<hr />
<button onClick={loadBooks}>获取书籍数据</button>
<button onClick={loadMovies}>获取电影数据</button>
</div>
);
}
export default App;