Animated sticker keyboard for react-native with customizable sticker's
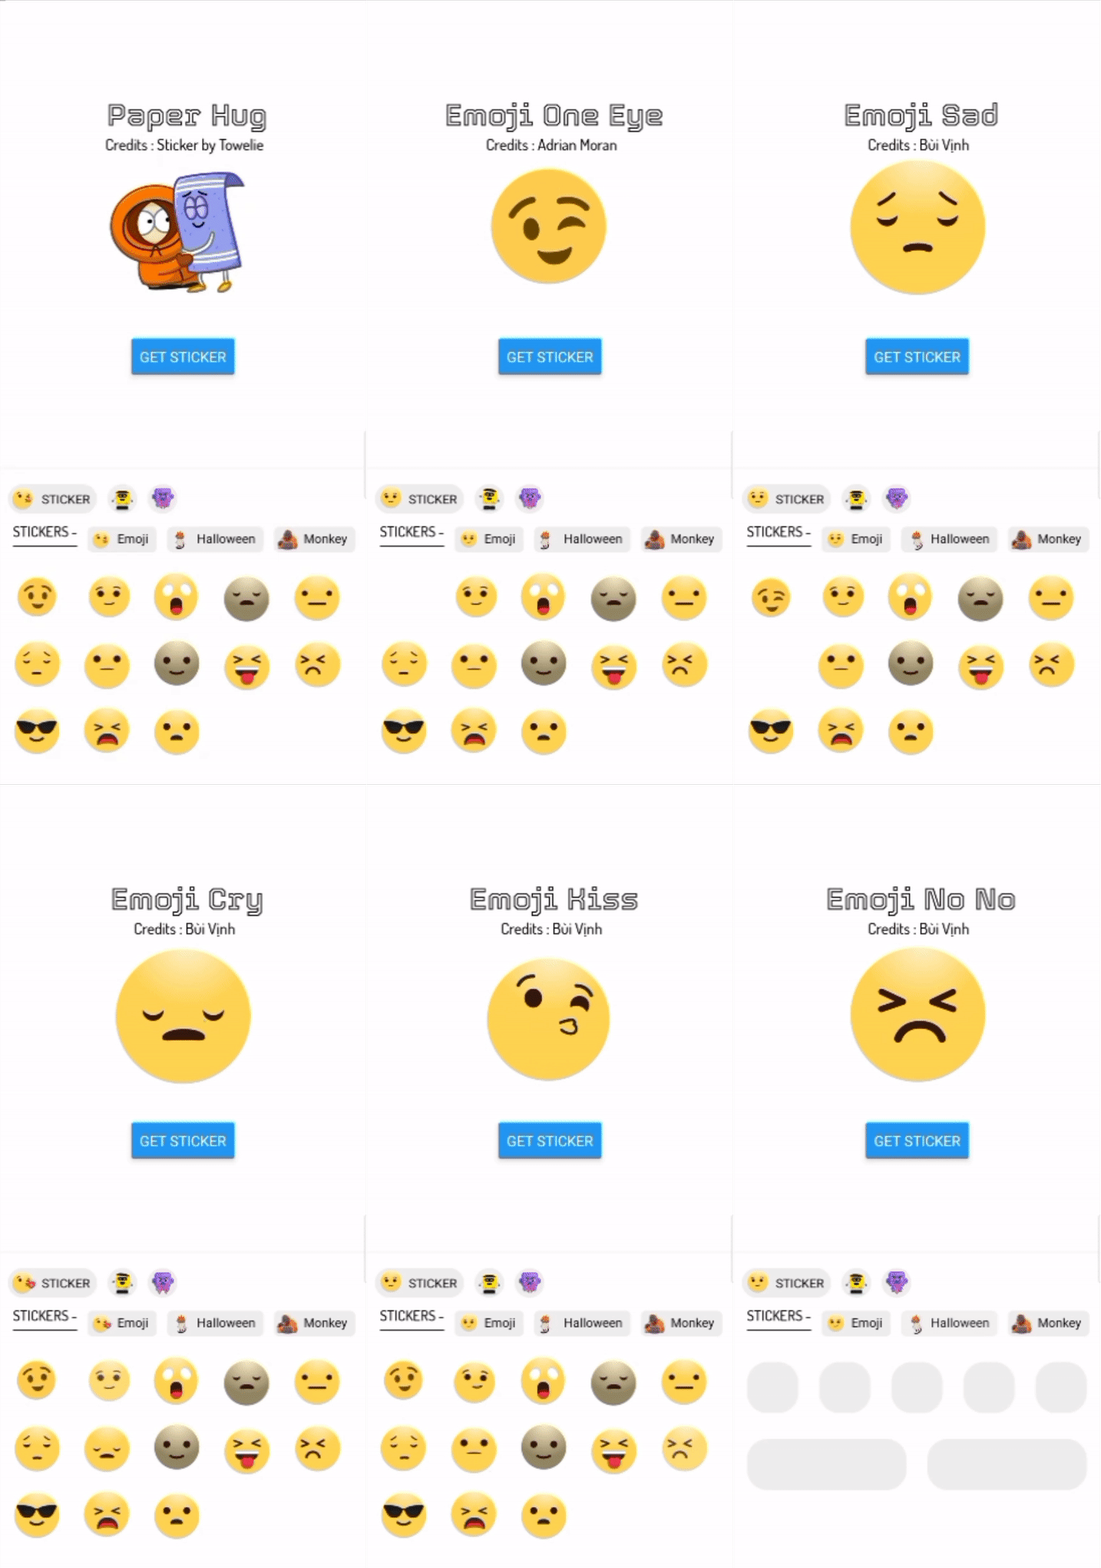
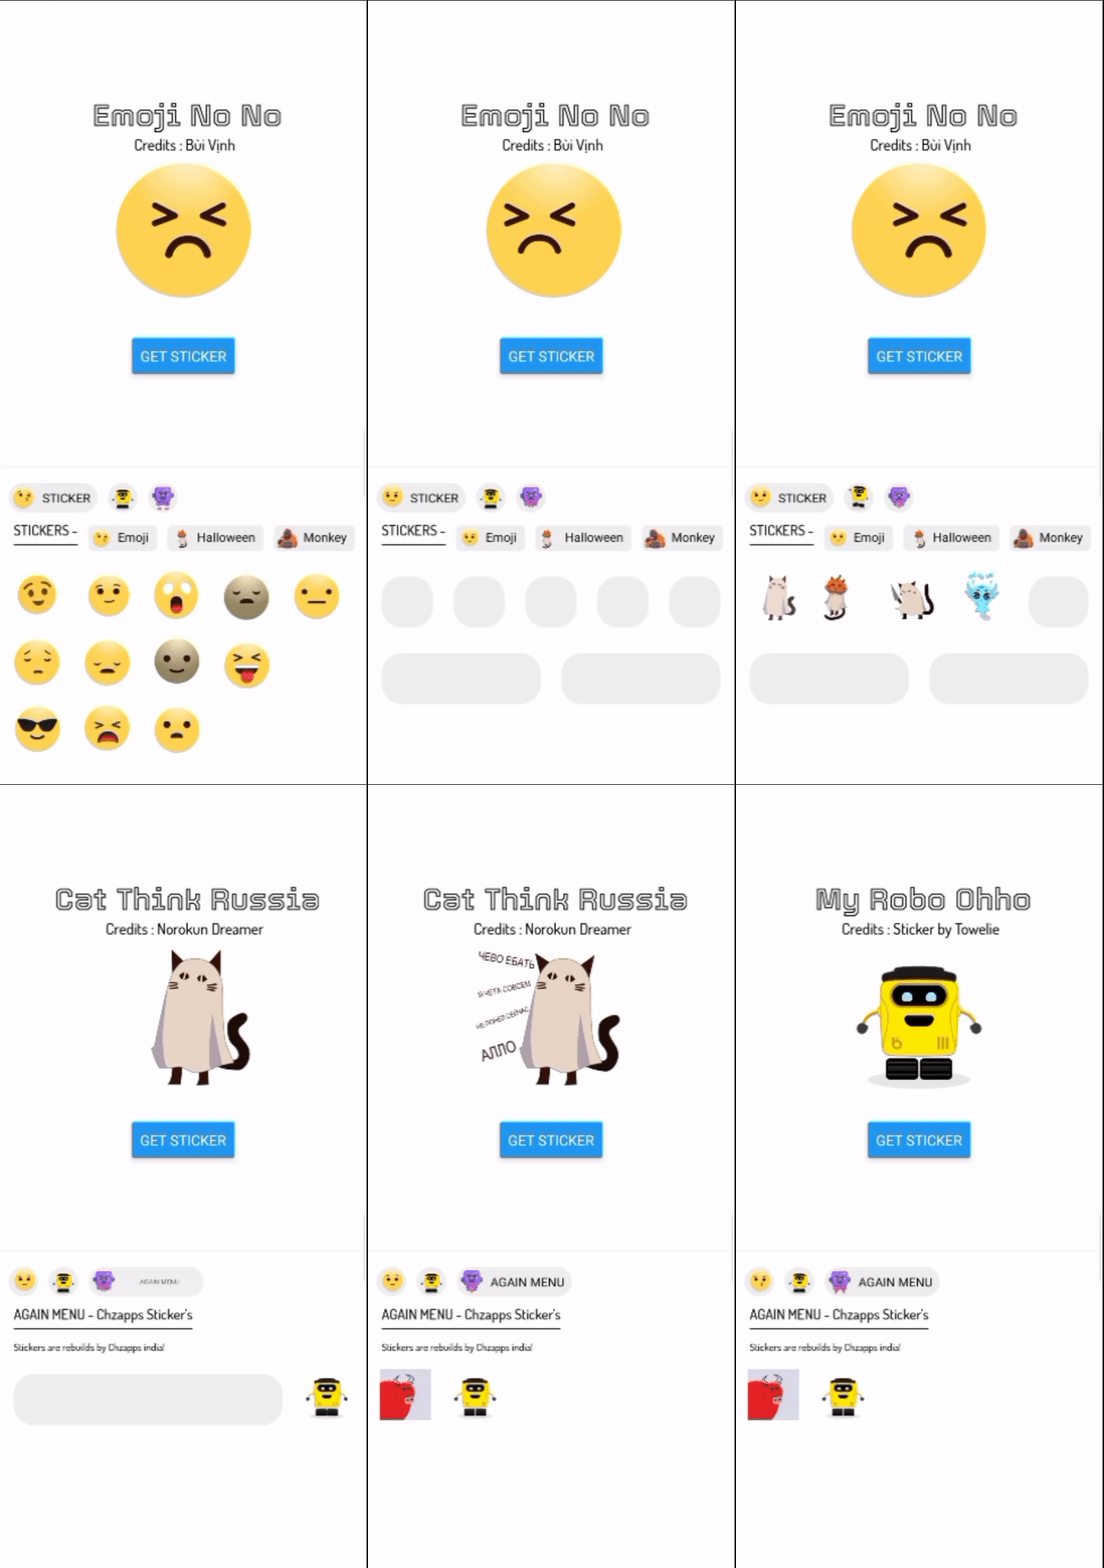
| IMAGE 1 | IMAGE 2 | IMAGE 2 HIGH RES |
|---|---|---|
 |
 |
 |
Image show above may different from current version please refer #changelog
READ UPDATED DOCUMENT HERE
🥇 FIRST TIME IN REACT-NATIVE
npm install @react-native-async-storage/async-storage --save
npm install lottie-react-native --save
npm install lottie-ios --save

OR

yarn add @react-native-async-storage/async-storage
yarn add lottie-react-native
yarn add lottie-ios
If you are using this library for IOS then
go to ios folder by running cd ios on terminal of your project
then run this command pod install
💃 Now it's time to download react-native-animated-stickers-chz
yarn add react-native-animated-stickers-chz

yarn react-native link react-native-animated-stickers-chz

OR

npm install react-native-animated-stickers-chz

npx react-native link react-native-animated-stickers-chz
To work properly please link assets by npx react-native link react-native-animated-stickers-chz
| ℹ️ INFO : Run your projects to link these dependencies else error with show! |
|---|
Our keyboard want's to know our app name and also if we use external sticker So we need initialize the keyboard in App.js or on your initial screen
import AnimatedSticker from 'react-native-animated-stickers-chz';

 const StickerInit = {
    app_name: 'MY SWEET APP', //--> Your app name that can tag on copyright text and many more place....
    use_external: true, //--> false if your are not using custom sticker
    }

 AnimatedSticker.InitialApp(StickerInit)
😍 Cool your app has been initialized
- Import Dep
- Sticker Keyboard
- onSend sticker send
- onBackPress keyboard backpress
- Sticker View
- Sticker View on Chat
- Check if it is valid sticker
- Other functions / Methods
- Intialize app
- is it a stciker method
- get Name of sticker
- add your custom catogery 💌
- add your custom Sticker 🌼
- Create custom sticker refernce
import AnimatedSticker from 'react-native-animated-stickers-chz';
import AnimatedStickerKeyboard from 'react-native-animated-stickers-chz/AnimatedKeyBoard'
import AnimatedStickerView from 'react-native-animated-stickers-chz/AnimatedStickerView';
Sticker Keyboard need proper space to view so place the sticker keyboard on bottom , View chart for refernce
 ┌───────────────────────────────────┐
 │  MAIN VIEW WITH FLEX 1 AND OTHER  │
 │  STYLES                           │
 └────────────────┬──────────────────┘
                  │
  ┌───────────────┴─────────────────┐
  │ SECOND VIEW WITH FLEX 1 AND     │
  │  YOUR STYLE  INSIDE MAIN        │
  └──────────────┬──────────────────┘
                 │
                 ▼
   ┌────────────────────────────────┐
   │ KEYBOARD AFTER  VIEW 2 BOTTOM  │
   └────────────────────────────────┘
I know that you didn't get anything 😄 Check the code below for more!!
import React, { useState } from 'react';
import {  View, BackHandler, Button } from 'react-native';
import AnimatedStickerKeyboard from 'react-native-animated-sticker-chz/AnimatedKeyBoard'

const App = () => {
const [vis, setVis] = useState(false)

  const handleBackButtonClick = async () => {
    if (vis) {
      setVis(false)
    } else {
      BackHandler.exitApp()
      //Other think when backPress on invisible keyboard
      return true
    }
  }

return(
 {/* MAIN VIEW */}
 <View style={{ backgroundColor: 'white', flex: 1, justifyContent: 'center', alignItems: 'center', }}>

         {/* SECOND VIEW */}
      <View style={{ justifyContent: 'center', alignItems: 'center', flex: 1 }}>
       <Button title='GET STICKER' onPress={() => { setVis(!vis) }} />
      </View>

       {/* KEYBOARD AFTER SECOND VIEW BOTTOM */}
      <AnimatedStickerKeyboard
        textButtonColor={'#000'}
        infoText={false}
        visibility={vis}
        onSend={(uri) => { console.log(uri) }}
        keyBoardStyle={{ backgroundColor: '#fff' }}
        menuButtonStyle={{ backgroundColor: '#00000010' }}
        onBackPress={() => { handleBackButtonClick() }}
        textColor={'black'}
        hideDes={false}
        hideFooter={true}
        placeHolderColor={'#00000010'}
      />
    </View >
)

}
export default App;
Let me explain the whole code!
Here we placed a view with flex 1 on top of keyboard so that View ajust size on keyboard hide/show
we use state for visibility of keyboard
So when user press back while keyboard is shown , We want to tell keyboard what to do onBackPress
so here keyboard will hide normally , But our state is not updated it means keyboard will popup again 😧
This props onBackPress will help us Hurr! 👁️🗨️
 const handleBackButtonClick = async () => {
    if (vis) {
      setVis(false)
    } else {
      BackHandler.exitApp()
      //Other think when backPress on invisible keyboard
      return true
    }
  }
Here if(vis) will check if keyboard is visible or not
function work like if keyboard is visible or keyboard back press then update state to flase else do other think on backPress
When user click or swipe a stciker it need to updated in your chat or state!
so this props ònSend will help us , this is a callbackFunction More about callback function
Here is an example
<AnimatedStickerKeyboard
        onSend={(uri) => { sendMessage(uri) }}
      />
here i will send message to state with arrow function
const sendMessage = (message) =>{
setMessageState([...messageState , {id : 100 , message : message}])
}

// here we got message from our call back function props onSend

<AnimatedStickerKeyboard
        //Other props
        onSend={(uri) => { sendMessage(uri) }}
/>| PROPS NAME | REQUIRED / USAGE | TYPE |
|---|---|---|
| textButtonColor | No / For Category button color | String / color |
| infoText | No / show info of Category [Deprecated] | Boolean |
| visibility | Yes / show & hide of keyboard | Boolean |
| onSend | Yes / get Uri and data of sticker | callback function |
| keyBoardStyle | No / set style of keyboard like background color | ViewStyleProp / styles |
| menuButtonStyle | No / Category menu button style | ViewStyleProp / styles |
| onBackPress | Yes / What to do onBackPress | function |
| textColor | No / Text color of description and Category name | string / color |
| hideDes | No / Hide keyboard Category description | Boolean |
| hideFooter | No / Hide footer of keyboard branding | Boolean |
| placeHolderColor | No / Color of before sticker render | String / color |
| textFont | No / Replace font | FontFamily |
| onDo | Deprecated | Deprecated |
Haha we succefully send sticker and we get uri which looks like @chzapps/sticker/@render/_emoji_kiss.sticker.no.start.apps/auto/false/size=userPref,{render=true}/@data/ims
Now we need to render sticker based on uri!
Sticker View will help us ? sure ✋
So we need to pass uri to sticker look the refernce below
import StickerView from 'react-native-animated-stickers-chz/AnimatedStickerView'

<AnimatedStickerView
            stickerHeight={150} //--> sticker height
            stickerWidth={150} //--> sticker width
            source={'@chzapps/sticker/@render/_emoji_kiss.sticker.no.start.apps/auto/false/size=userPref,{render=true}/@data/ims'} //--> uri that we get from keyboard
/>here source props will convert uri to sticker if sticker uri is valid ... wait ! how can i check if it's valid or not 😰
That's why our hero is here 🦸♂️ AnimatedSticker.isSticker() will help us!
example
const p = '@chzapps/sticker/@render/_emoji_kiss.sticker.no.start.apps/auto/false/size=userPref,{render=true}/@data/ims'
if (AnimatedSticker.isSticker(p)) {
      console.log('sticker' + AnimatedSticker.getName(p))
    } else {
      console.log('It\'s not a sticker!!')
    }
you need to import AnimatedSticker like : import AnimatedSticker from 'react-native-animated-stickers-chz'
**Now implement sticker view on chet **
- You need to send message uri without any space and other char
- Check if it is a valid sticker !
Here is an simple example
I have a flatlist and my renderItem is renderItem={data => renderItem(data)}
so my code will look like
const renderItem = (data) => {
    if (AnimatedSticker.isSticker(data.item.message)) {
      return (<StickerView
        source={data.item.message}
      />
      )
    } else {
      return (
        <View>
          <Text>Not a sticker</Text>
        </View>
      )
    }
  }
This a simple example here if message is a sticker Uri then it will render sticker else your data
You can do with another method
 const renderItem = (data) => {
    return (
      AnimatedSticker.isSticker(data.item.message) ? <StickerView source={data.item.message} />
        :
        <View>
          <Text>Not a sticker</Text>
        </View>
    )
  }
Here we used ternary operator which act like if else as ? :
| PROPS | REQUIRED / USAGE | TYPE | EXAMPLE |
|---|---|---|---|
| stickerWidth | No / Default is 100 and can set max of your device width | Number | stickerWidth={150} |
| stcikerHeight | No / Default is 100 and can set max of your device height | Number | stickerHeight={150} |
| source | Yes / Sticker uri | chzapps type URI | source={'@chzapps/sticker/@render/_emoji_kiss.sticker.no.start.apps/auto/false/size=userPref,{render=true}/@data/ims'} |
Let our keyboard want's to know your app name and also if you use external sticker So you need initialize the keyboard in App.js or on your initial screen
import AnimatedSticker from 'react-native-animated-stickers-chz';

 const StickerInit = {
    app_name: 'MY SWEET APP', //--> Your app name that can tag on copyright text and many more place....
    use_external: true, //--> false if your are not using custom sticker
    }

AnimatedSticker.InitialApp(StickerInit)Check if given uri is a valid sticker
example
const renderItem = (data) => {
    if (AnimatedSticker.isSticker(data.item.message)) {
      return (<StickerView
        source={data.item.message}
      />
      )
    } else {
      return (
        <View>
          <Text>Not a sticker</Text>
        </View>
      )
    }
  }
This a simple example here if message is a sticker Uri then it will render sticker else your data
You can do with another method
 const renderItem = (data) => {
    return (
      AnimatedSticker.isSticker(data.item.message) ? <StickerView source={data.item.message} />
        :
        <View>
          <Text>Not a sticker</Text>
        </View>
    )
  }
get name of sticker
example
const p  = '@chzapps/sticker/@render/_emoji_kiss.sticker.no.start.apps/auto/false/size=userPref,{render=true}/@data/ims'

if (AnimatedSticker.isSticker(p)) {
      console.log('sticker' + AnimatedSticker.getName(p))
    } else {
      console.log('It\'s not a sticker!!')
}Cool you can create and upload your sticker
see refernce for animation size and types #ref
example
AnimatedSticker.setExtraCategory([
    {
      id: 101,
      value: 'robot_new_word',
      url: true,
      file: 'https://assets10.lottiefiles.com/packages/lf20_y8fx3fts.json',
      content: 'Stickers are rebuilds by Chzapps india!',
      username: 'Chzapps Sticker\'s'
    },
    {
      id: 102,
      value: 'again_menu',
      url: true,
      file: 'https://assets7.lottiefiles.com/animated_stickers/lf_tgs_utvjcw5v.json',
      content: 'Stickers are rebuilds by Chzapps india!',
      username: 'Chzapps Sticker\'s'
    },
])| NAME | TYPE | DES |
|---|---|---|
| id | number must start from 101 | is your unique id and it must start from 101,102..... |
| value | String not space need to use _ instated of space | is your category name |
| url | Boolean always set it to true | set it to url else file will not load 🩹 |
| file | Json file see below for reference | is your json file uri that you will get from Here |
| content | String / description | is your category discerption |
| username | String / username - creator name | username of creator most probarly it's you 😅 |
see refernce for animation size and types #ref
set extra emojis
see refernce for animation size and types #ref
example :
 AnimatedSticker.setExtraEmojis([
    {
      id: 3001,
      name: "tow_lee",
      cat: "robot_new_word",
      url: "https://assets2.lottiefiles.com/animated_stickers/lf_tgs_RQdYhC.json",
      credit: "Sticker by Towelie",
      profile: 'http://github.com/chzappsinc',
      social_type: 'github'
    },
    {
      id: 3002,
      name: "its_me_bull",
      cat: "again_menu",
      url: "https://assets10.lottiefiles.com/private_files/lf30_mdazblit.json",
      credit: "Sticker by Towelie",
      profile: 'https://in.linkedin.com/in/muhammed-jasim-t-k-4aaa4916a',
      social_type: 'linkedin'
    },
    {
      id: 3003,
      name: "_my_robo_ohho",
      dark: true,
      cat: "again_menu",
      url: "https://assets10.lottiefiles.com/packages/lf20_y8fx3fts.json",
      credit: "Sticker by Towelie",
      profile: 'http://instagram.com/chzappsinc',
      social_type: 'whatsapp'
    }
])| PROPS | TYPE | DES |
|---|---|---|
| id | number must start from 101 | is your unique id and it must start from 3001,3002,3003,3004..... |
| name | String not space need to use _ instated of space | is your sticker name |
| url | Boolean always set it to true | set it to url else file will not load 🩹 |
| dark | Boolean | Set true if sticker have dark content , it help to make visible dark content in dark backgrounf |
| cat | String / name of category | In which category sticker should show |
| credit | String / username - creator name | username of creator most probarly it's you 😅 |
| profile | Url / String | url of your socail media or website |
| social_type | String / instagram,whatsapp,facebook,github,twitter,linkedin | icon type of follow button |
files from here
Dont use space in sticker name or category name use underscore _
make sure that file size is not more then 100KB , Resolution: >= 512x512 if its not 512x512 keyboard may crash please always check your sticker
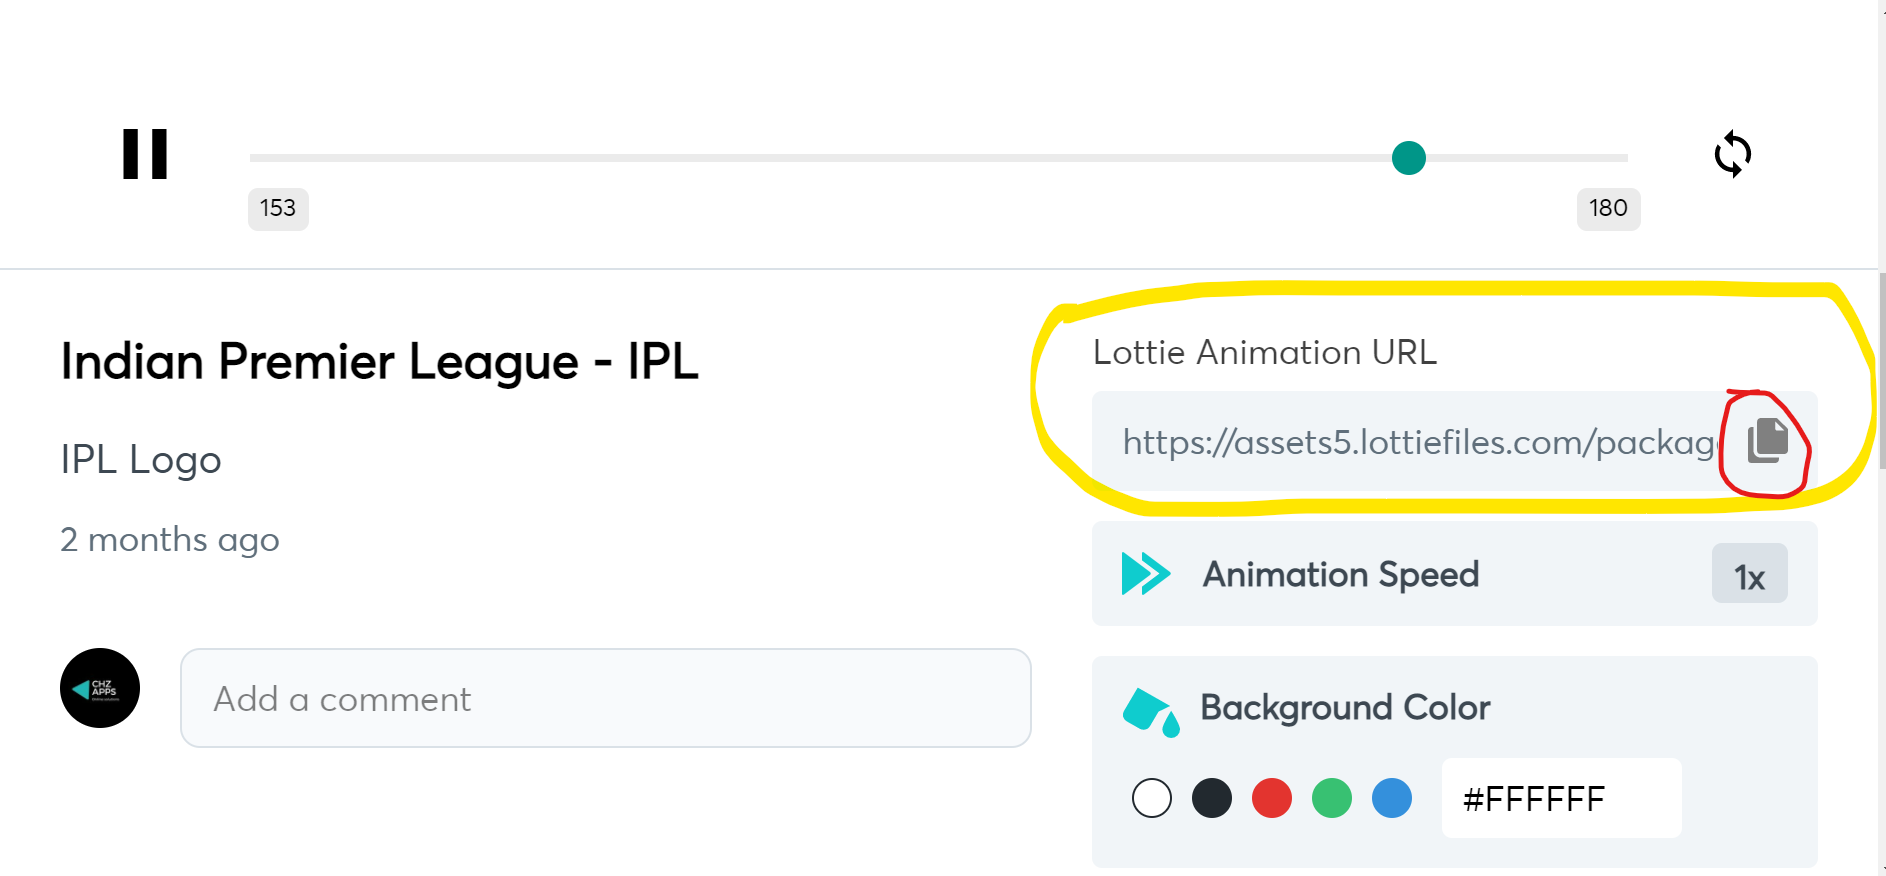
Here take this as refernce : animation here when you scroll down you can see
In the below marked with red is resulation on animation and it's okay beacuse its 512x512 but yellow marked have good size but have 30 layer's it may take delay to render (may be)
Support our developers to make it possible


