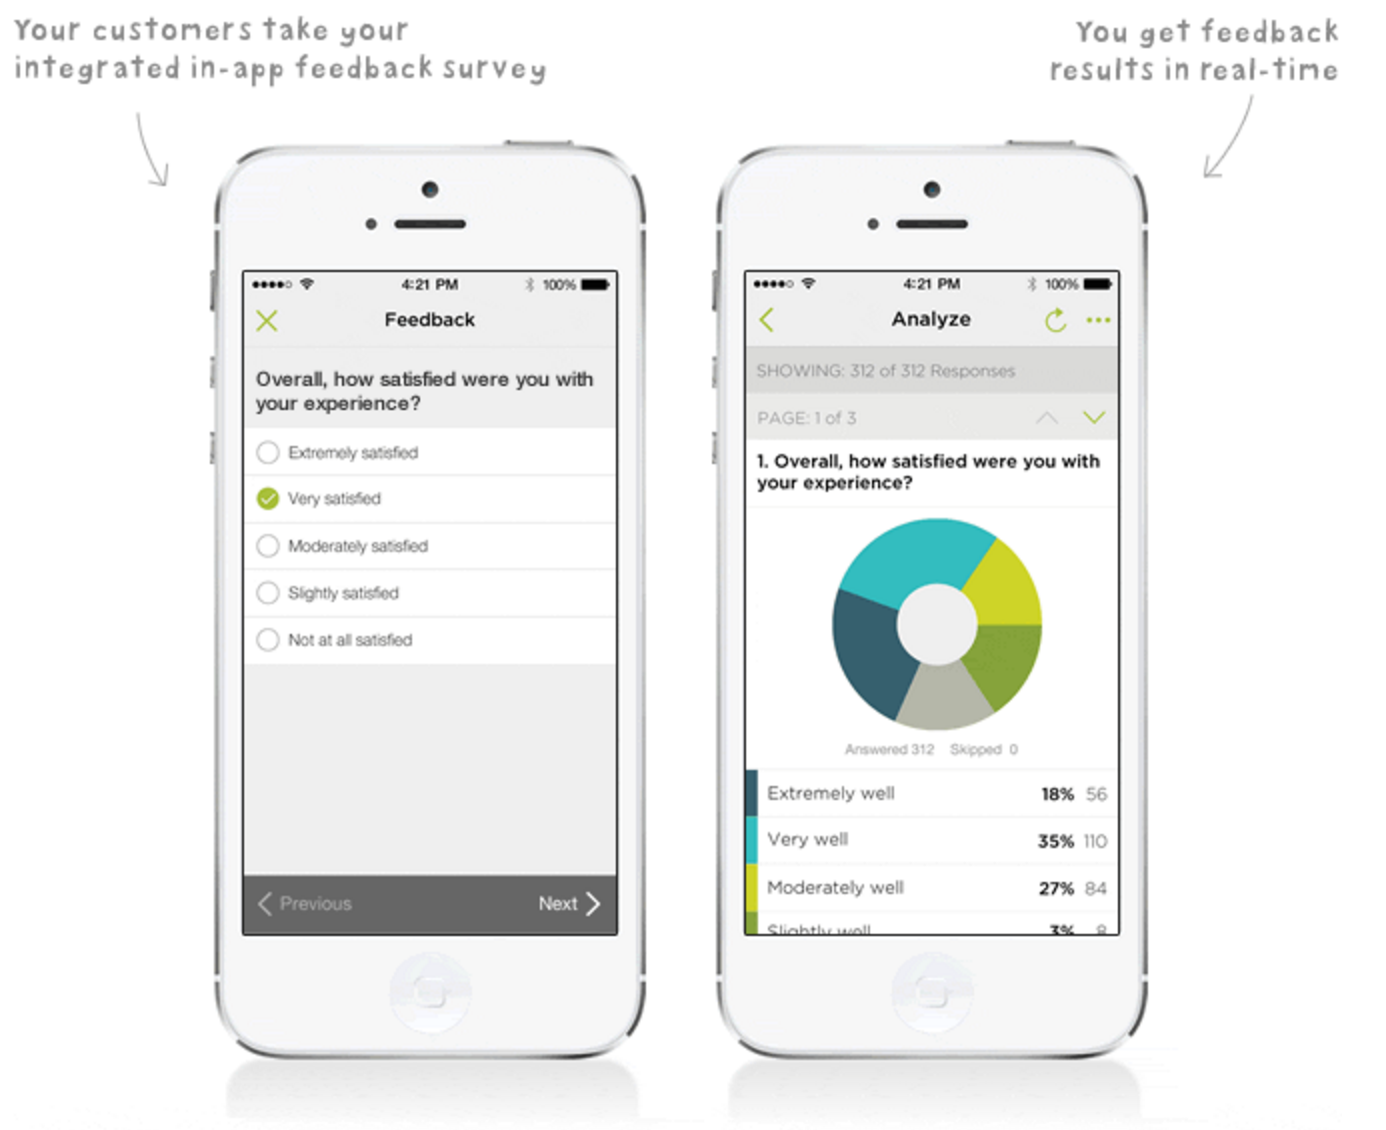
Want to improve your product and app store ratings? The SurveyMonkey Mobile Feedback SDK gives you all the tools you need to collect user feedback about your in-app experience.
- Log in to SurveyMonkey and create a survey asking users what improvements they want to see and how they’d rate your app
- Integrate the survey into your mobile app using our mobile SDK
- Get product feedback in real time and prompt satisfied customers to rate you
Download the latest release or clone the SDK.
git clone https://github.com/SurveyMonkey/surveymonkey-ios-sdk.gitOR
CocoaPods is a dependency manager for Objective-C, which automates and simplifies the process of using 3rd-party libraries like our SDK in your projects. You can install it with the following command:
$ gem install cocoapodsTo integrate the SDK into your Xcode project using CocoaPods, specify it in your Podfile:
source 'https://github.com/CocoaPods/Specs.git'
platform :ios, '12.0'

pod 'surveymonkey-ios-sdk', '~> 2.1.2'
Then, run the following command:
$ pod installOR
Instructions for Swift Package Manager support can be found at SwiftPackageManager.md.
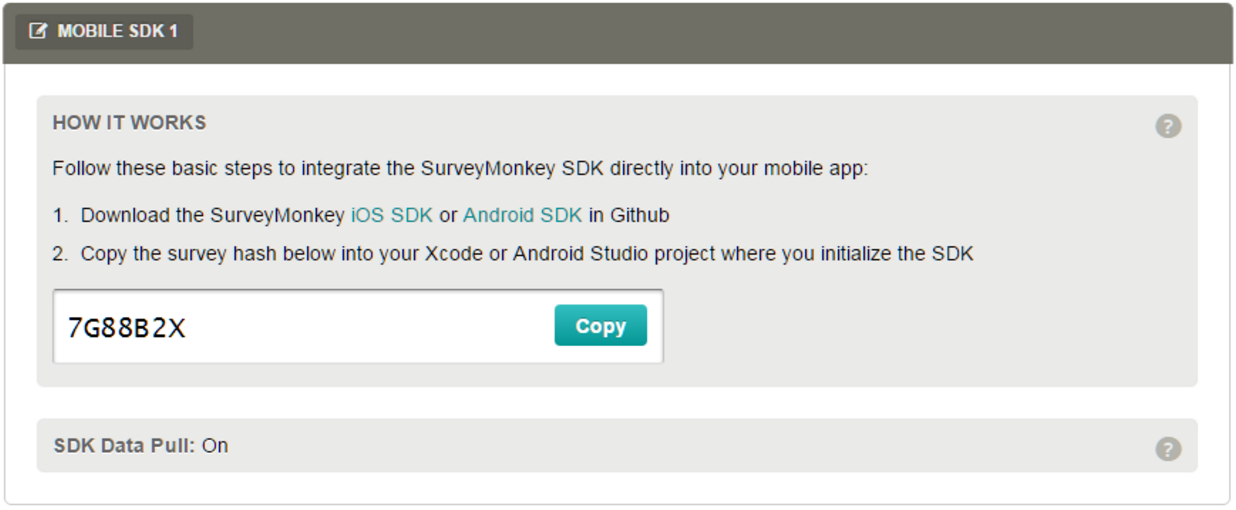
You must create your survey and set up your SDK Collector in www.surveymonkey.com.
- Once you create your survey, navigate to the Collect tab and select +New Collector > SDK from the menu on the righthand side
- Click Generate. The code you generate is your Survey Hash, you'll Copy this and use it to point the SDK to your survey in the steps below
- In the project navigation sidebar, right-click on the Frameworks group and select "Add files to [ProjectName]"
- Navigate to the surveymonkey-ios-sdk directory that is contained in your cloned version of the surveymonkey-ios-sdk and select the SurveyMonkeyiOSSDK.xcframework file
- Make sure that "Copy items if necessary" is checked and all targets that will use the SDK are selected
- Import the SDK
#import <SurveyMonkeyiOSSDK/SurveyMonkeyiOSSDK.h>import SurveyMonkeyiOSSDK- Depending on your usage, add a property to your interface:
@property (nonatomic, strong) SMFeedbackViewController * feedbackController;var surveyController: SMFeedbackViewController!- Initialize the SDK and set its delegate:
_feedbackController = [[SMFeedbackViewController alloc] initWithSurvey:{SAMPLE_SURVEY_HASH}];
_feedbackController.delegate = self;self.surveyController = SMFeedbackViewController(survey: {SAMPLE_SURVEY_HASH})
self.surveyController.delegate = self- If you have Advantage Plan or higher, and want to include custom variables with each survey response, create a flat NSDictionary* with your custom variables and use:
_feedbackController = [[SMFeedbackViewController alloc] initWithSurvey:{SAMPLE_SURVEY_HASH} andCustomVariables:{SAMPLE_CUSTOM_VARIABLES_DICTIONARY}];self.surveyController = SMFeedbackViewController(survey: {SAMPLE_SURVEY_HASH}, andCustomVariables: {SAMPLE_CUSTOM_VARIABLES_DICTIONARY})
self.surveyController.delegate = selfUsage of the respondent data returned by the SurveyMonkey Feedback SDK requires that you have a Advantage account or higher and that your class implement the SMFeedbackDelegate and the -respondentDidEndSurvey:error: method therein
The survey respondent data is returned as an SMResponse. Here's an example:
- (void)respondentDidEndSurvey:(SMRespondent *)respondent error:(NSError *) error {
    if (respondent != nil) {
        SMQuestionResponse * questionResponse = respondent.questionResponses[0];
        NSString * questionID = questionResponse.questionID;
        if ([questionID isEqualToString:FEEDBACK_QUESTION_ID]) {
            SMAnswerResponse * answerResponse = questionResponse.answers[0];
            NSString * rowID = answerResponse.rowID;
            if ([rowID isEqualToString:FEEDBACK_FIVE_STARS_ROW_ID] || [rowID isEqualToString:FEEDBACK_FOUR_STARS_ROW_ID]) {
                [_statusLabel setText:@"Thanks! Please rate us in the app store!"];
            }
            else {
                [_statusLabel setText:@"Thanks for taking our survey. We'll address the issues you encountered as quickly as possible!"];
            }
        }
    }
    else {
      NSLog(@"%@", error.description);
    }

}extension ViewController: SMFeedbackDelegate {
func respondentDidEndSurvey(_ respondent: SMRespondent!, _ error: Error!) {
// TODO
}
}Look at the Simple Survey sample project in our Github repo for a detailed example.
To kick off the SurveyMonkey Feedback SDK Intercept process, call the following from your main activity:
[_feedbackController scheduleInterceptFromViewController:self withAppTitle:{SAMPLE_APP_NAME}];self.surveyController.scheduleIntercept(from: self, withAppTitle: {SAMPLE_APP_NAME})This will check to see if the user should be prompted to take your survey (i.e. if (timeSinceLastSurveyPrompt > maxTimeIntervalBetweenSurveyPrompts)).
You can customize the copy of the prompts, as well as the time intervals. See our documentation for more information about specific features and classes.
To present a survey for the user to take, call:
[_feedbackController presentFromViewController:self animated:YES completion:nil];self.surveyController.present(from: self, animated: true, completion: nil)UIViewControllerRepresentable instance is used to create and manage a UIViewController object in your SwiftUI interface.
import SwiftUI
import UIKit
import SurveyMonkeyiOSSDK

struct SMView: UIViewControllerRepresentable {
    func makeUIViewController(context: Context) -> SMViewController {
        let vc = SMViewController()
        return vc
    }
    func updateUIViewController(_ uiViewController: SMViewController, context: Context) {
    }
    typealias UIViewControllerType = SMViewController
}

class SMViewController: UIViewController, SMFeedbackDelegate {

    override func viewDidLoad() {
        super.viewDidLoad()
        //Add your survey hash here
        guard let sm = SMFeedbackViewController.init(survey: "surveyHash") else { return }
        sm.present(from: self, animated: true, completion: nil)
        sm.delegate = self
    }

    //Called when The survey respondent data is returned as an SMResponse
    func respondentDidEndSurvey(_ respondent: SMRespondent!, error: Error!) {
        if respondent != nil { //... }
    }
}

 //Called from SWIFTUI view to load the form
struct ContentView: View {
    @State private var showingSMForm:Bool = false

    var body: some View {
        Button("Take Survey", action: {
            self.showingSMForm = !self.showingSMForm
        })
        if(showingSMForm) {
            SMView()
        }
    }
}
To report issues with the SDK collector, please contact us at [email protected].
What can I use the mobile SDK for?
A simple, multiple choice question can help you understand just how satisfied users are with your app. Based on their level of satisfaction, you can tailor the rest of their in-app experience. For example, if a user reports a moderate level of satisfaction, you can ask them a follow-up question to identify the problem and prioritize a solution by your development team.
The best way to perform user research is to listen. A product manager can quickly find out which features a user is yearning for, and which features aren’t meeting expectations. Based on the findings, a product team can adjust roadmaps to be more responsive for their growing mobile user base and don’t have to passively wait for an app store review to see what is and isn’t working.
How can I prompt users to give feedback?
You can set up predefined time intervals to prompt for in-app feedback from a random sample of your users. This is referred to as a “scheduled intercept” in the developer documents. For example, you can set the in-app feedback to prompt a user within 3 days after they install or update the app. If the user selects “Give Feedback,” you don’t show the prompt for 3 months. If the user selects “Not Now,” you prompt them again in 3 weeks. The time intervals are completely customizable by the developer.
You can prompt the user for in-app feedback if they visit a certain part of the app or click a specific button. For example, if you notice users dropping out of your checkout screen, you can ask them why in real time. This information can lead to key product insights, such as moving certain fields around to better align with your customers’ priorities.
Many apps have a slide-out menu that allows their users to access a variety of items such as Account, About Us, or Help. At SurveyMonkey, we’ve included Feedback in our slide-out menu to passively prompt users for feedback. You can incorporate this into your own app so users can provide feedback whenever they want.
How can I route my app users to different flows based on their survey response?
If you have an ADVANTAGE plan or higher, you can program your app to route your users into different flows based on their responses to your survey. For example, if a user responds to your in-app feedback survey and gives your app a 5-star rating, your app could take that user down the “5-Star Rating Flow” into the app store to rate your app. You could also take a user down the “Needs Improvement Flow” to the help center in your app.
Is the mobile SDK free?
Yes, the mobile SDK can be incorporated into your app with any SurveyMonkey plan. However, developers must upgrade to ADVANTAGE or higher to take actions based on responses to survey questions (prompt users who report high satisfaction with your app to review it).
Custom variables are available in Advantage Plan or higher.
How can I style the survey? How will it look on a mobile device?
As with all SurveyMonkey surveys, you have the ability to customize the look and feel of your survey to match your mobile app. The survey page is mobile responsive so you can use the SDK on both smartphone and tablet devices.
Can I make edits once a survey is deployed?
You can edit a survey after you send it out. If the survey doesn’t have any responses, you can fully edit the survey. If the survey is live and already has responses, your editing options are limited. Edits you make to the survey go live as soon as you save them, so make sure you preview your work beforehand. You won’t need to submit a new version of your app to the app store to reflect any updates, and your survey hash will remain the same.
If you close or delete a collector in SurveyMonkey, your users will not see a prompt for in-app feedback.
Is the survey native to the app?
Yes, although the SDK requires an internet connection to load the survey. If the user’s device is offline he/she will not be prompted to take the survey.
I have an app on Android and iOS. How many mobile collectors do I need to create?
You can create one survey and set up multiple collectors to help you track where responses are coming from, i.e. one for your Android app and one for your iOS app.
How do I localize the survey for various locations?
We recommend creating multiple surveys, with the survey translated into different languages.
*What is the minimum OS version supported? iOS 7.x

